Binom 2.0 tracker review: updates and improvements

Table of Contents
Binom stands out as a self-hosted tracker, offering solutions for diverse tasks in affiliate marketing, including traffic management, cloaking, data analysis, and comprehensive campaign reporting. The recent release, Binom 2.0, brings significant enhancements to the platform. In this upgraded version, you can expect improved speed in various functions, increased throughput, and enhanced analytics.
Briefly about the new Binom 2.0
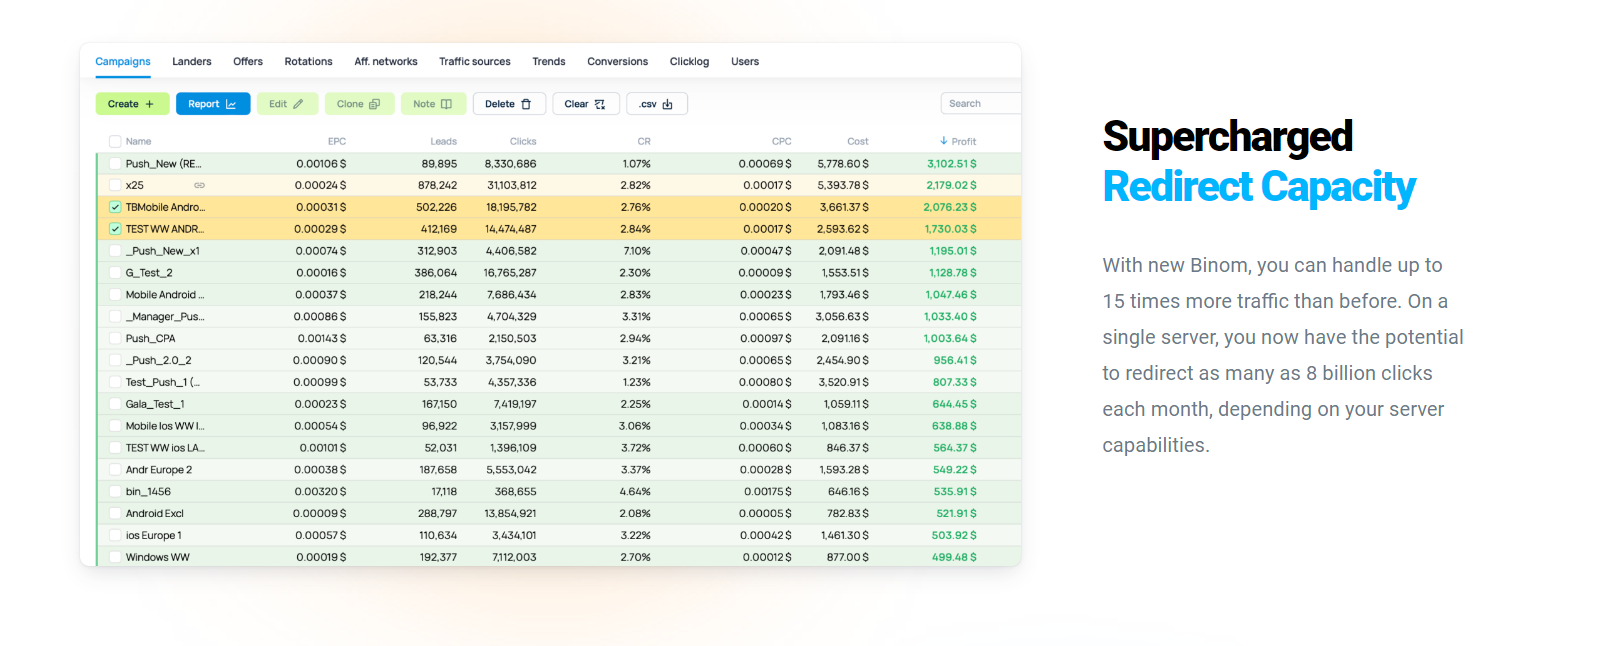
In the Binom 2.0 version, a complete architectural redesign has taken place, replacing MySQL with Clickhouse. This transformation has led to substantial improvements, notably boosting the speed of redirects, reporting, and click-log uploading. All reports are now generated simultaneously, regardless of the traffic volumes — whether it’s 10,000 clicks or over 1 million clicks per day.
In addition, the tracker’s throughput has surged by 15 times, accommodating up to 3000 clicks per second compared to the initial 200 in the first version. The maximum database volume has expanded sixfold, supporting up to 3 billion clicks instead of the previous 500 million. The storage capacity for click information has been halved, now requiring 1.5 GB per 1 million clicks instead of the initial 3 GB. And the total throughput of the new tracker version has reached an impressive 8 billion clicks per month.
Version 2.0 key features:
- Increased speed in both redirects and report generation
- 30 tokens instead of 10 for advertising networks
- 30 events instead of 10 for traffic analytics
- Additional reports
- Adding new domains without the need for server access
- A built-in file manager (files) eliminates the need to log in to the server
It’s noteworthy that the Binom team consistently releases updates every 2–4 weeks. The sequence of these updates is influenced, among other factors, by user requests submitted to the support team. To stay informed about the latest developments in the tracker, keep an eye on the news, and don’t hesitate to reach out to the support team if you encounter any challenges while working with Binom.
Binom 2.0 design
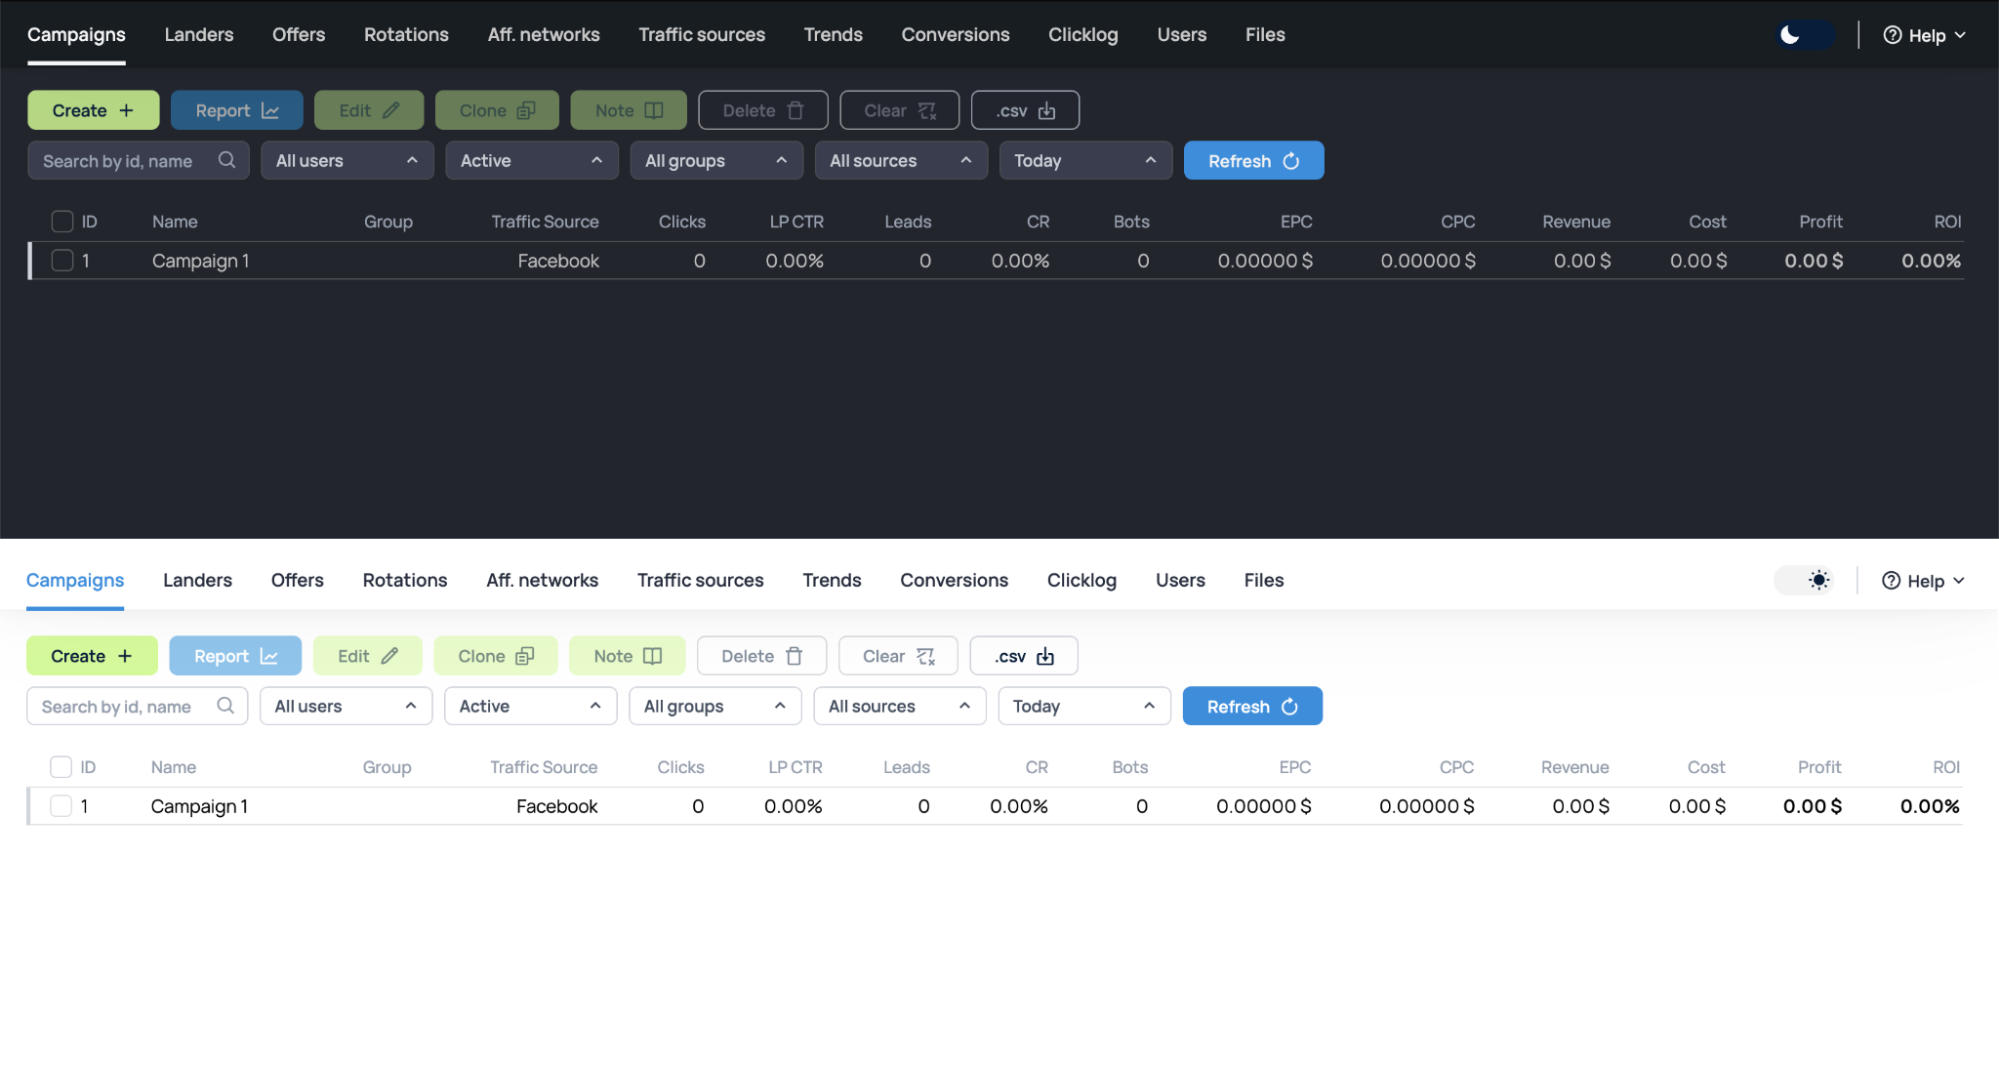
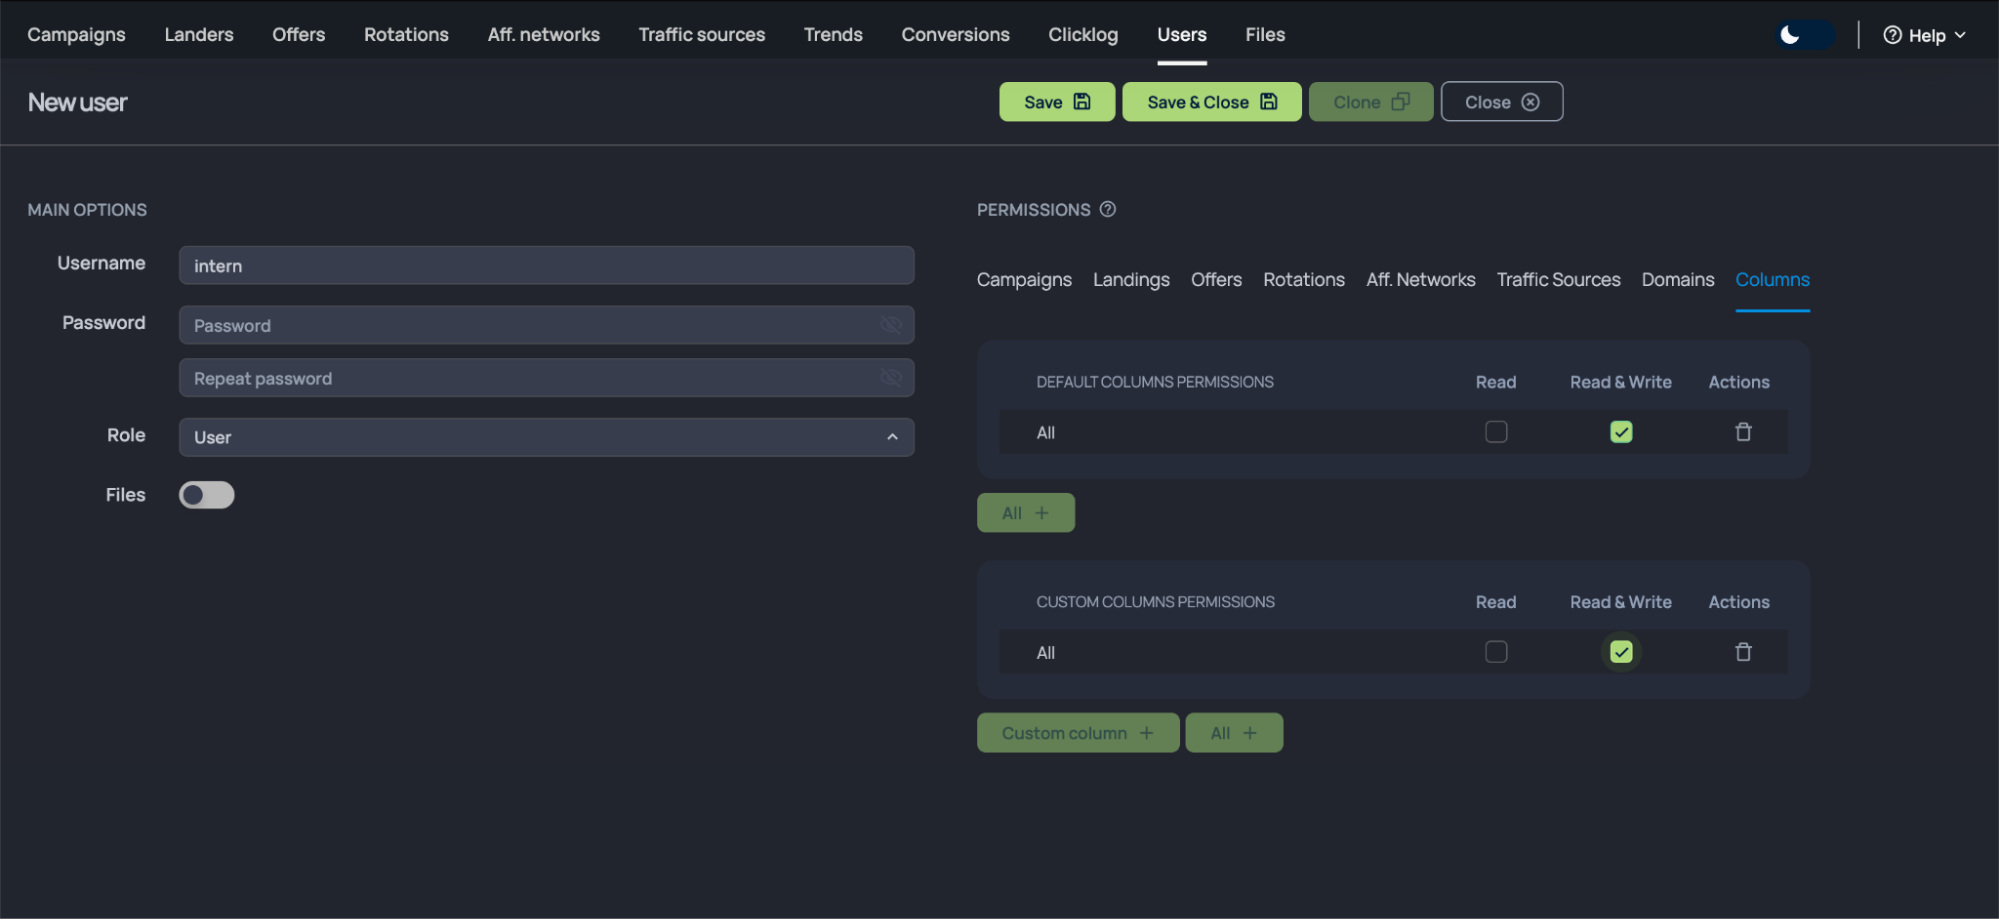
Binom 2.0 introduces an improved user interface for the user dashboard. It has been redesigned to be more user-friendly and intuitive. Additionally, users now have the option to choose between two display modes: the standard light design and a dark design for nighttime or low-light environments.
You can replenish your account in your dashboard in several ways: by direct payments, cryptocurrency, or via Capitalist.
Click transfer from v1 to v2
It’s important to acknowledge that due to the altered architecture, a complete data transfer from the initial version of Binom to the updated Binom 2.0 will not be feasible. However, you will have the capability to transfer essential settings, campaigns, landing pages (excluding integrated ones), offers, and user data. For a seamless transition between versions, it is advisable to smoothly migrate your operations and consider launching new campaigns directly in Binom 2.0.
Registration and tracker installation
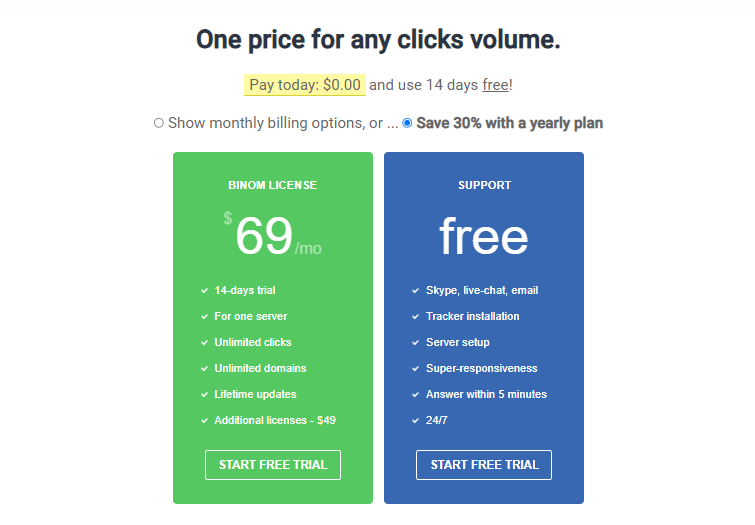
To commence your journey with Binom, you need to register. You can choose a plan during this process, but it’s optional. Alternatively, plan selection can occur post-registration.
Whether you pick your plan during registration or afterward, the 14-day trial period allows you to assess Binom’s capabilities at your convenience.
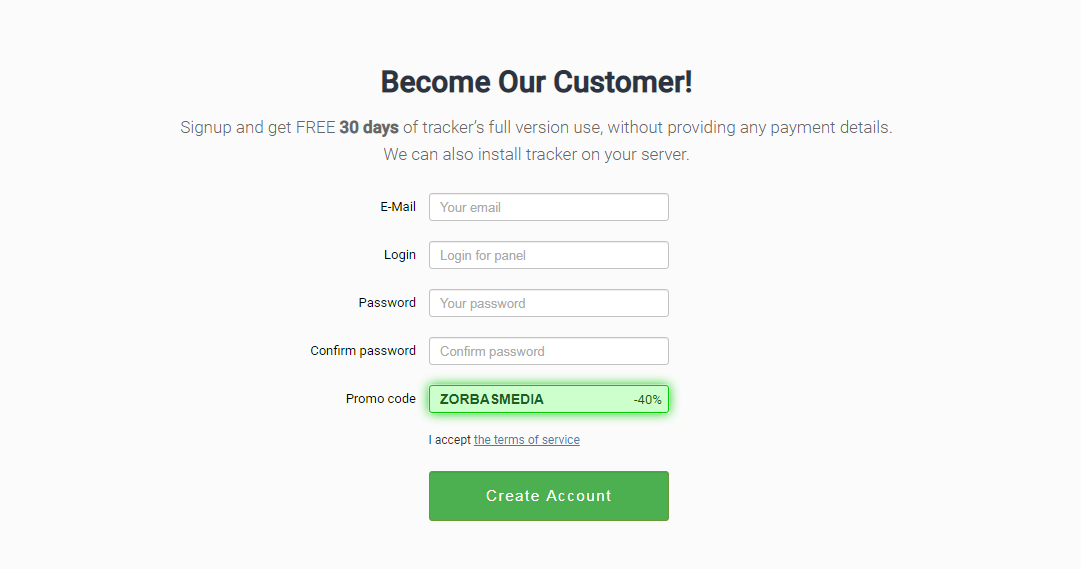
A complimentary 14-day test period allows you to thoroughly explore and comprehend all the advantages and features that the tracker has to offer.
The subsequent step involves deciding between the tracker versions:
Version 2: Equipped with a new kernel to handle heavier loads, an updated design, and monthly updates introducing new features.
Version 1: More cost-efficient, featuring a few unique features. However, it is in maintenance mode and will not receive further updates with new features.
If you have your own server and prefer cost-efficiency, choose the suitable settings and receive comprehensive installation instructions. Pick your preferred tracker version, then click on “Own Server.” Choose and purchase a domain for the tracker, or redirect it to an existing one. After selecting the license, proceed to the Binom installation. The second installation option is “Server by Binom” (i.e., cloud-version). In both cases, the support team is available to assist you with the tracker installation process.
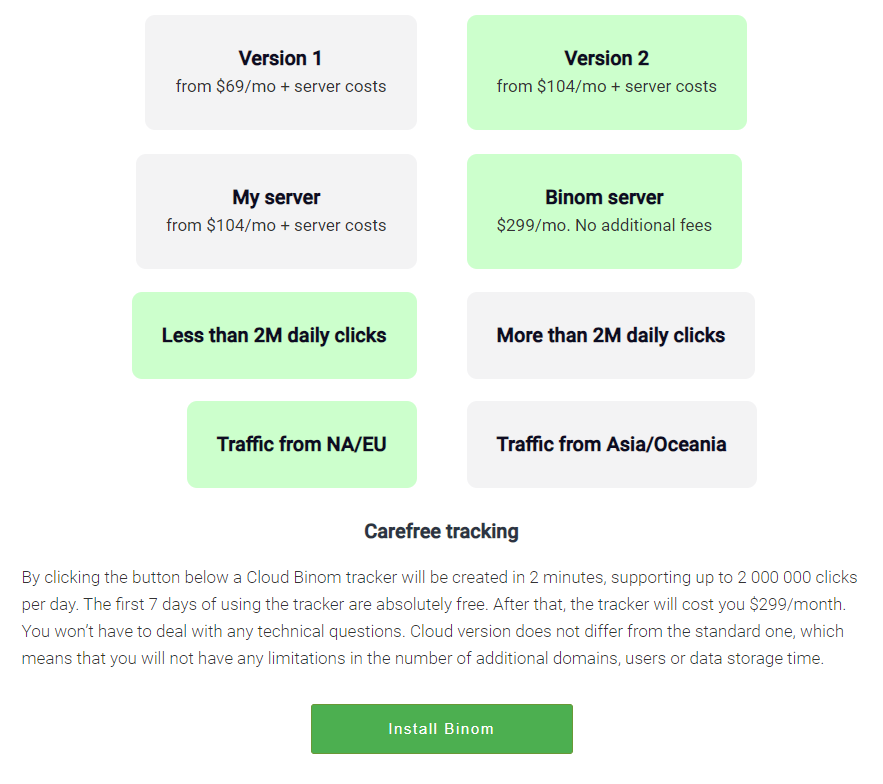
We opt for Version 2 to ensure we receive all critical updates promptly. As we lack our own server, we select the Cloud-Version. We click on the option that corresponds to the number of clicks and GEO we require.
Then we click on “Create Binom” to initiate the tracker installation process.
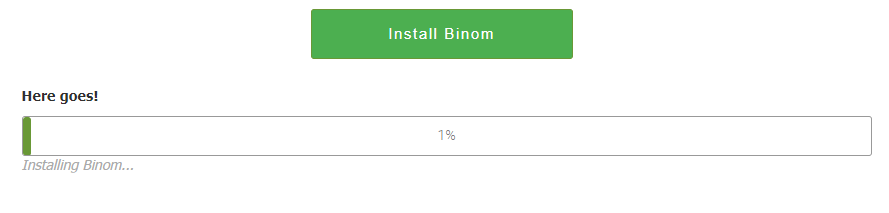
After the installation is complete, you will receive all login credentials, granting you access to the Binom platform.
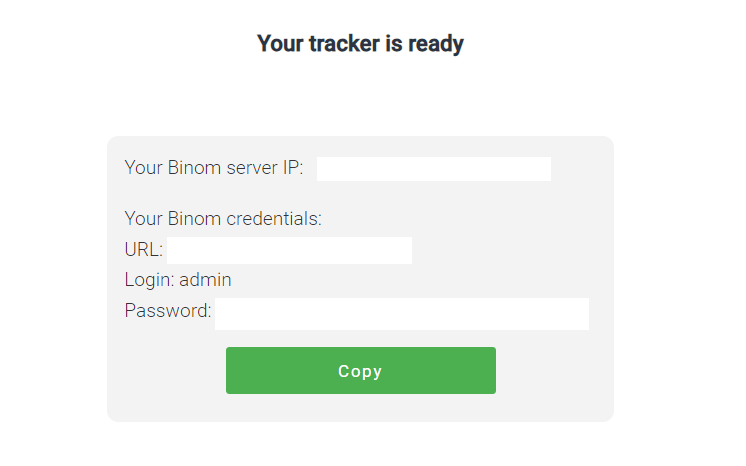
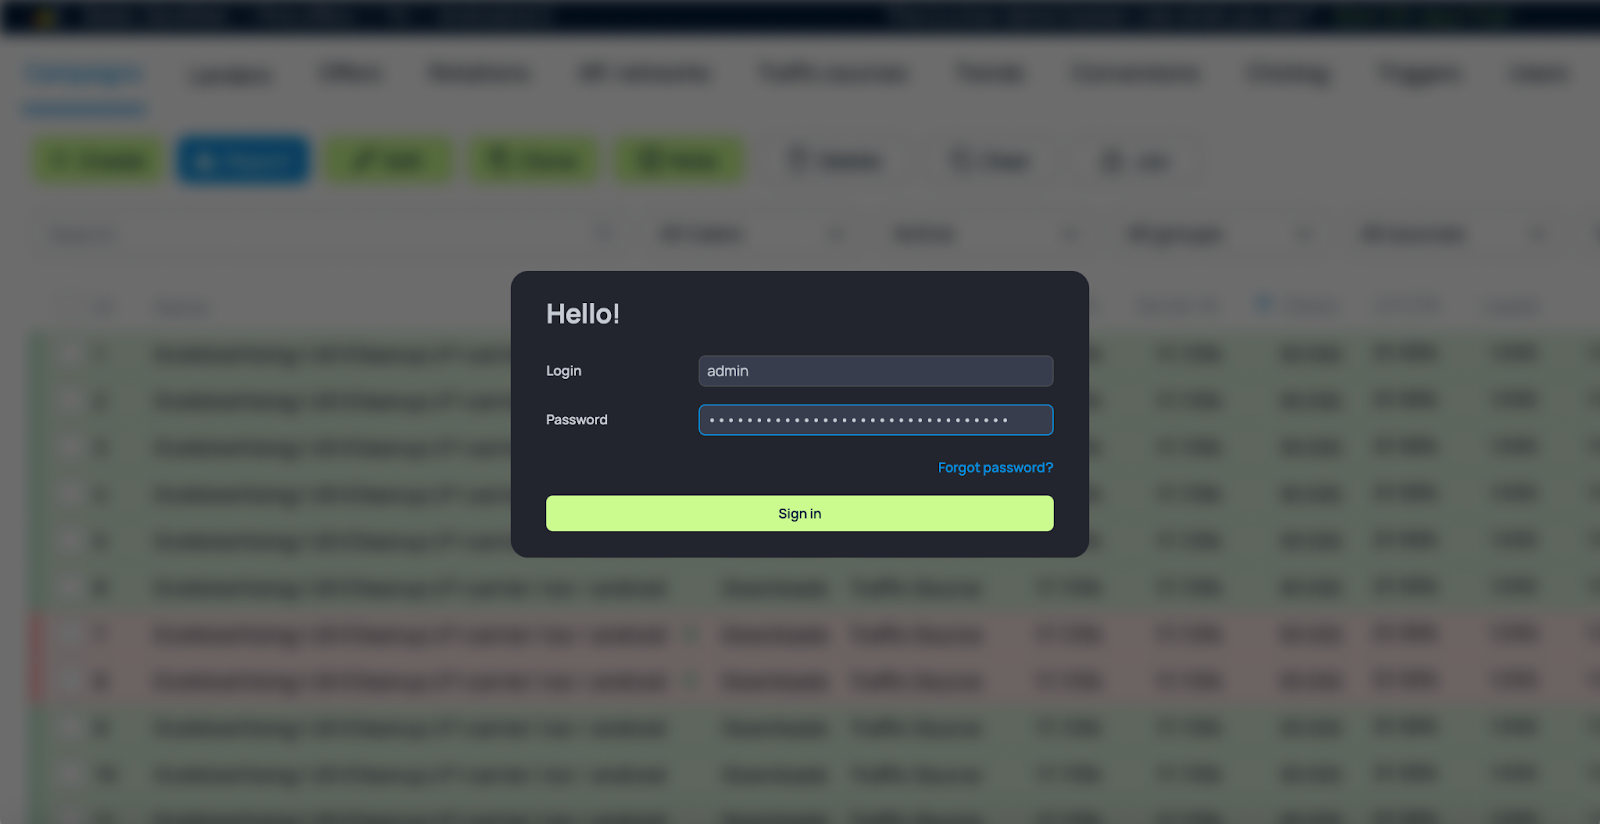
Click on the provided URL and you will be directed to the tracker’s login page.
Enter the login and password obtained from the previous step.
Compared to other trackers, where installation, server setup, and other manipulations demand significant time and technical expertise, Binom offers a streamlined process. We completed all procedures in just 5 minutes.
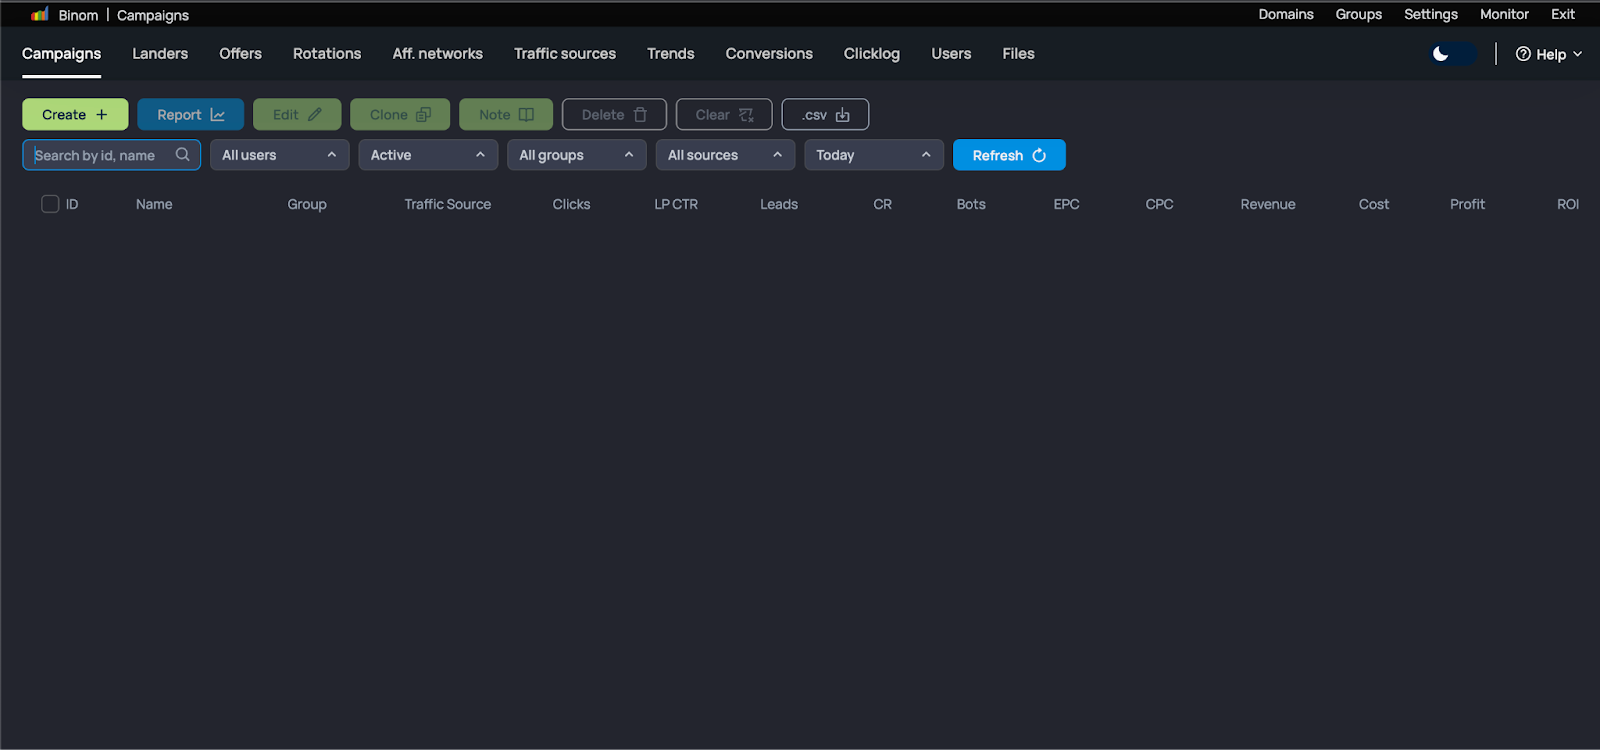
With just a couple of clicks, we are now inside the tracker, fully prepared to launch our initial advertising campaigns.
For any inquiries, you can refer to the comprehensive Binom Auto-install manual, providing detailed guidance on installing the tracker for the self-host version.
Launching an advertising campaign
Creation of an affiliate network
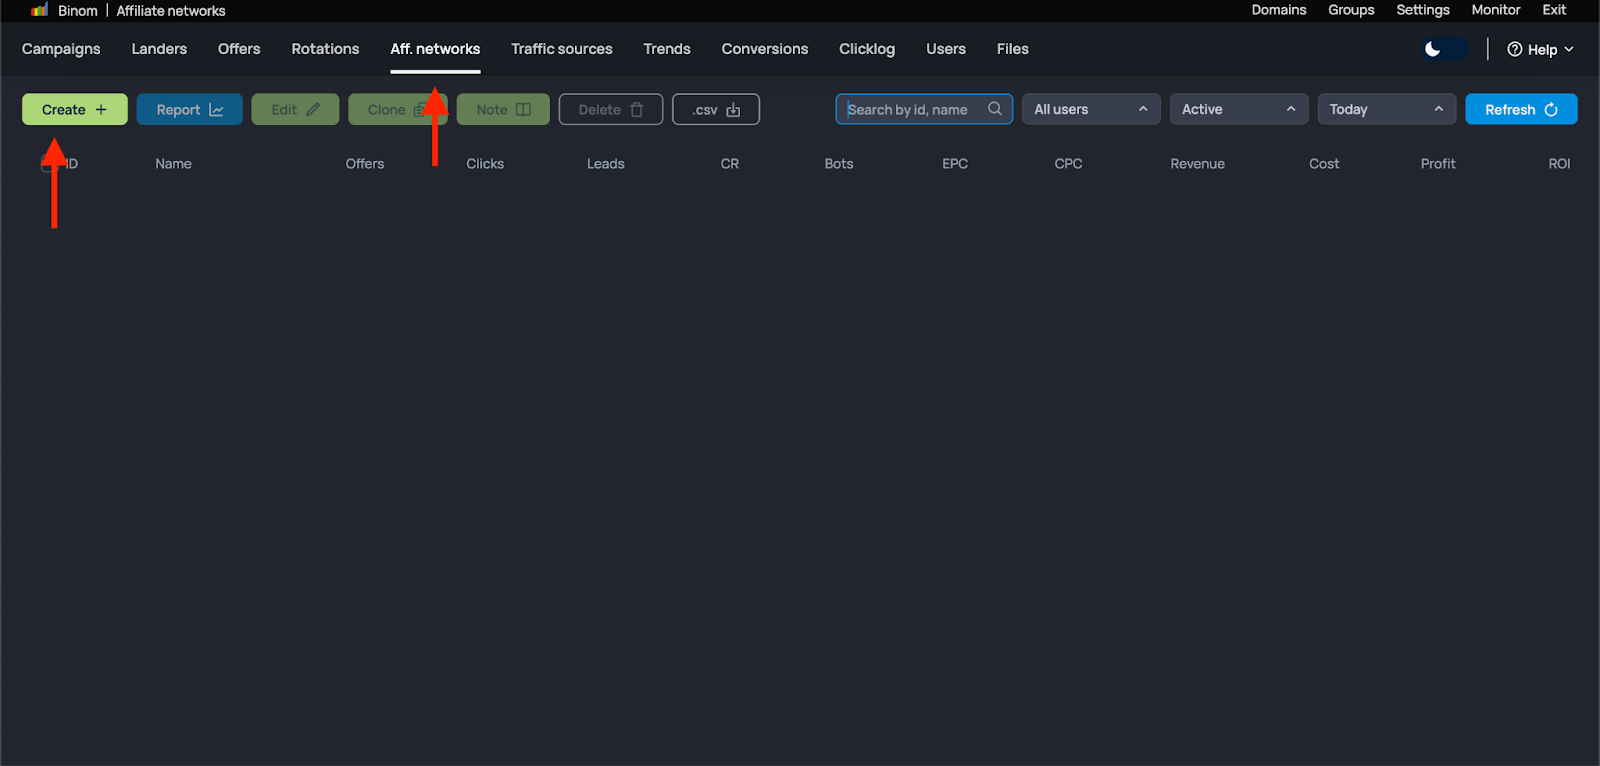
We start by creating an affiliate network. Navigate to “Aff.Networks” in the top menu and click on the “Create” option.
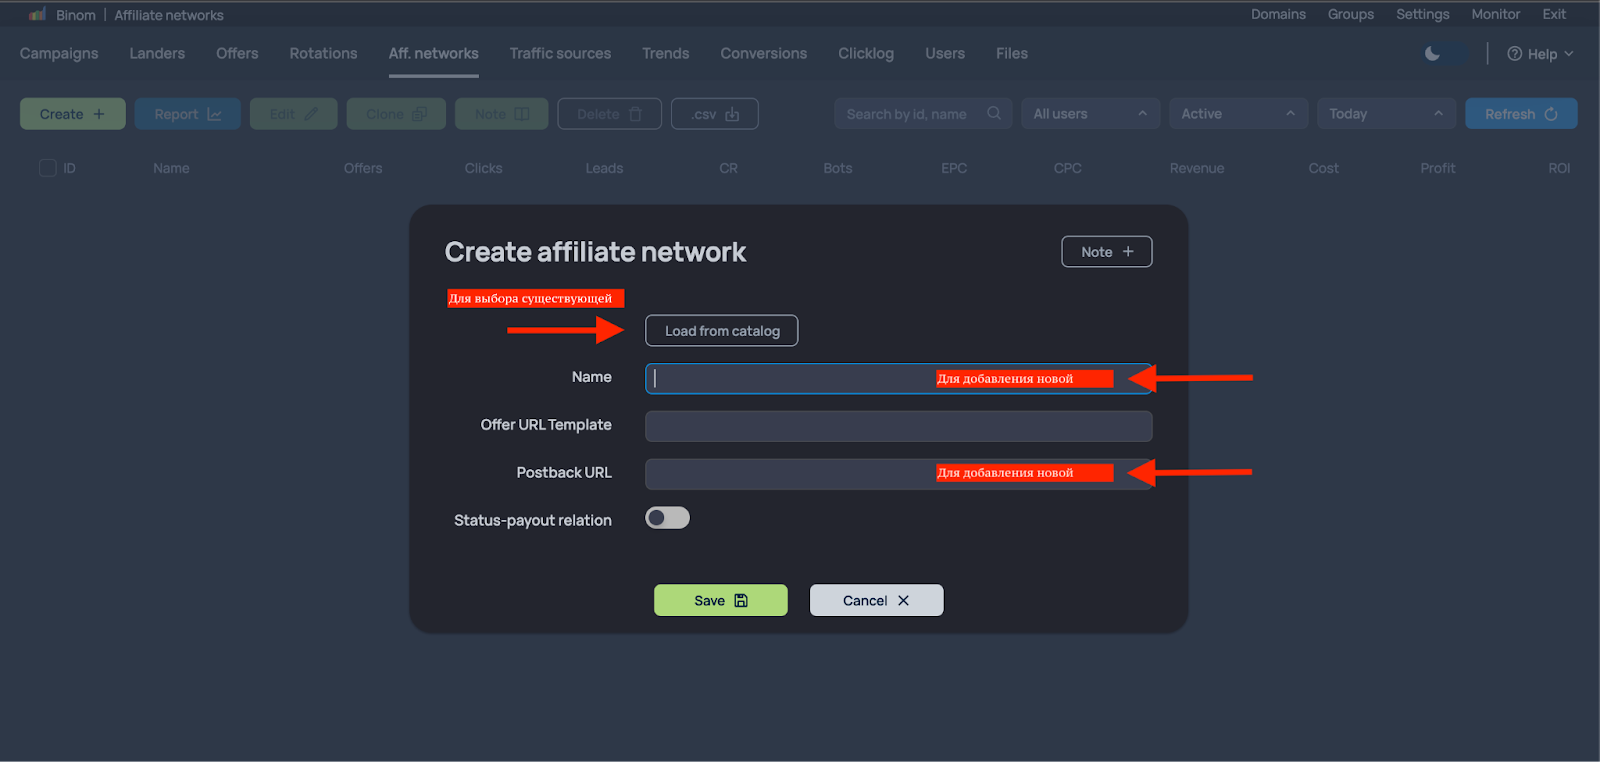
Click on “Load from catalog” to choose an affiliate network from the available templates. If starting a new one, input the network name and specify the post-back URL.
Click “Save” to confirm.
In Binom 2.0, you can now generate a report on affiliate programs. This proves beneficial when requesting a rate increase from the support manager.
Adding a traffic source
Next, we need to add a traffic source. To do this, we navigate to “Traffic Sources” in the top menu and click on “Create”.

Opt for the source you require, either from available templates (“Load from template”) or create a new one. Binom offers an extensive list of popular traffic sources. We are using Facebook*, so we locate it in the list and click “Save” to confirm our selection.
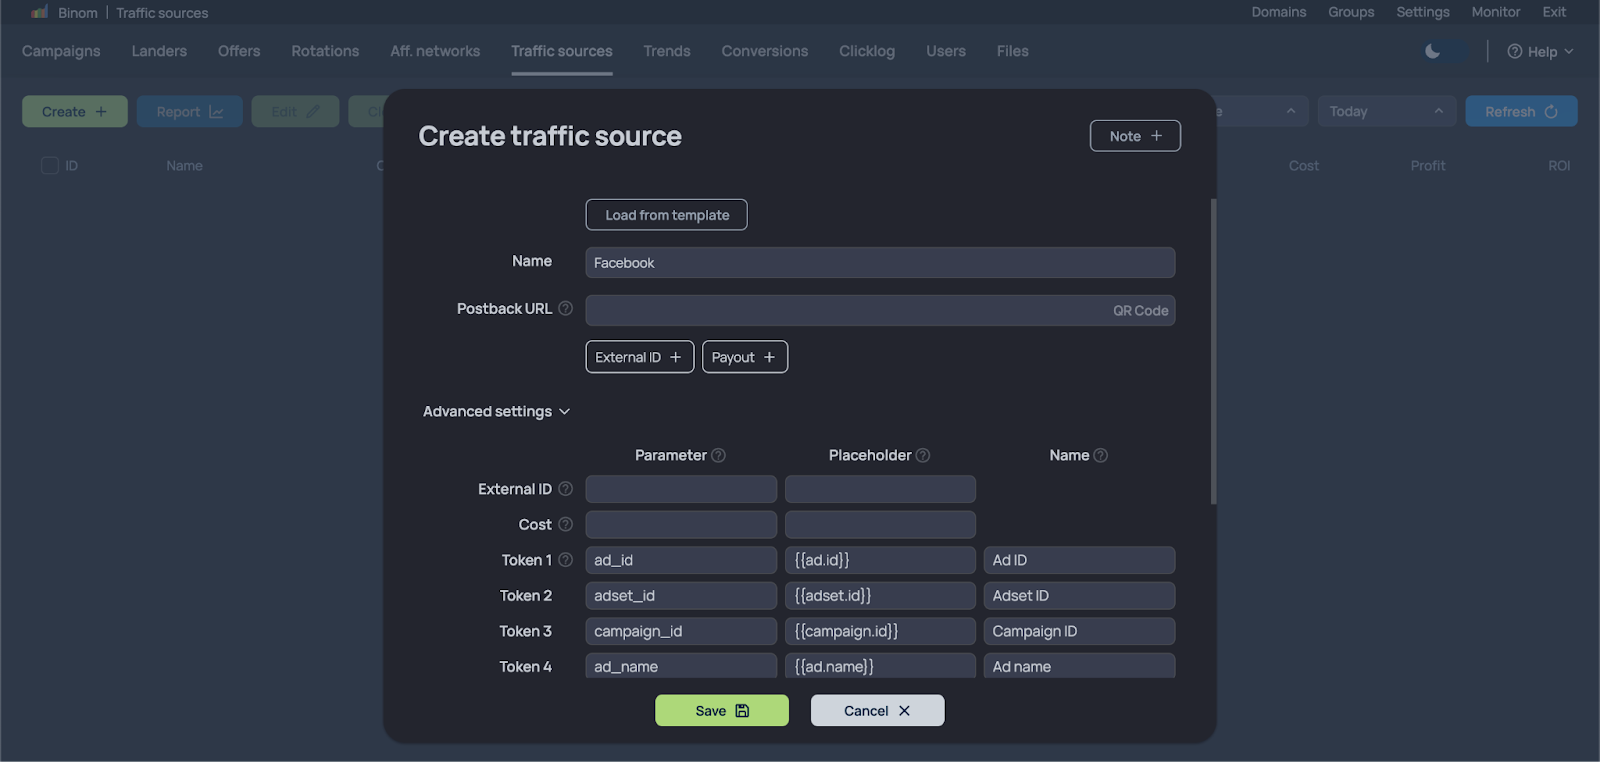
If you opt to configure the traffic source manually, follow these steps. In the “Name” tab, enter the name of the traffic source. In “Postback URL”, input the post-back URL.
In “Advanced Settings”, you can include additional parameters to be transmitted by the tracker, such as traffic loss and post-back percentage. You can utilize lines provided for entering token information — tokens assist in accurate tracking of clicks and impressions.
Binom 2.0 introduces significant enhancements. You now have 30 tokens available for sources, a notable increase from the previous limit of 10. No need to merge ad network tokens for restrictions anymore.
Reporting is now more convenient, allowing you to build reports by one or several sources. This enhancement enables a detailed comparison of the same traffic type from different networks.
Creating an offer
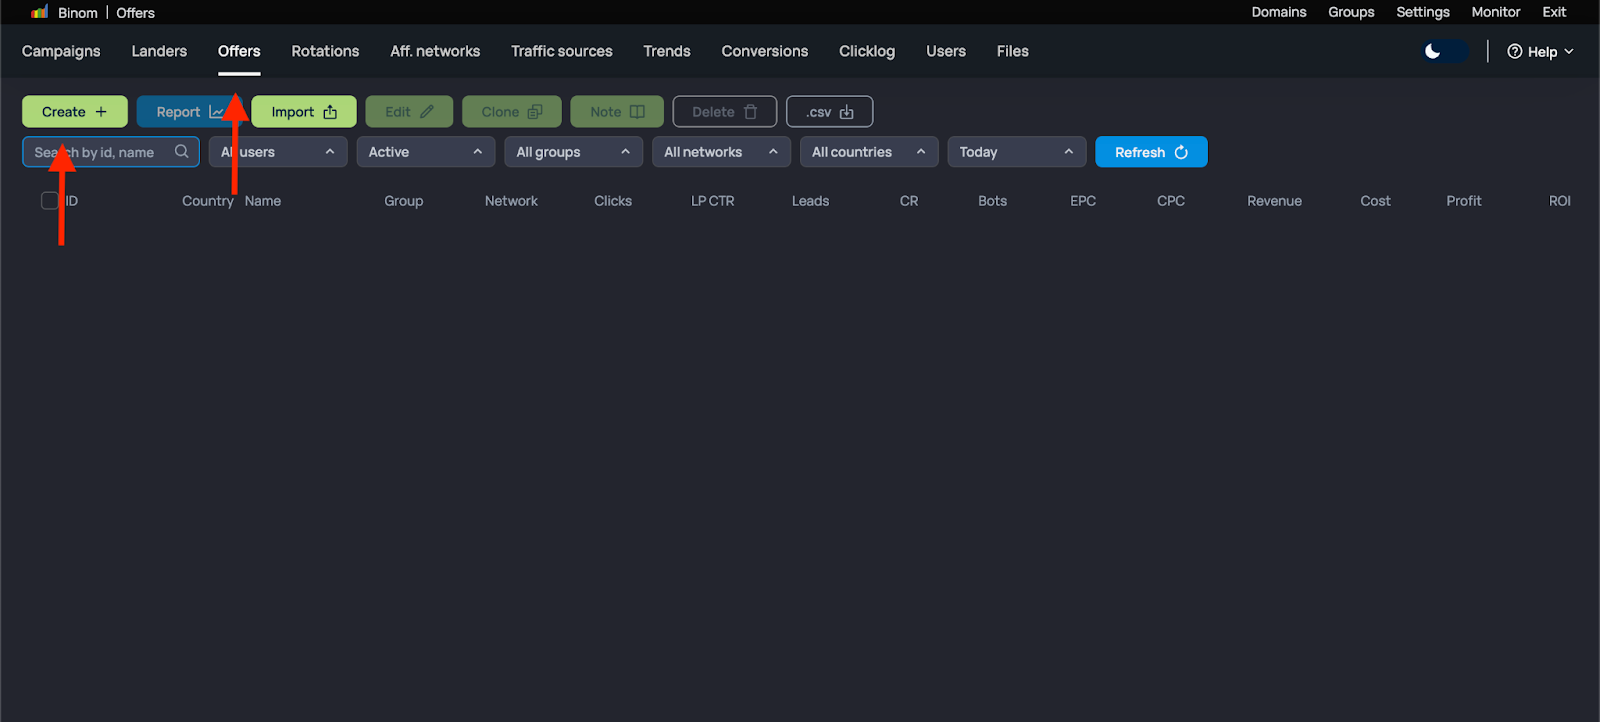
To create an offer, go to the “Offers” option in the top menu and click on “Create” to begin the creation process.
Visit your affiliate network and copy the link to the offer.
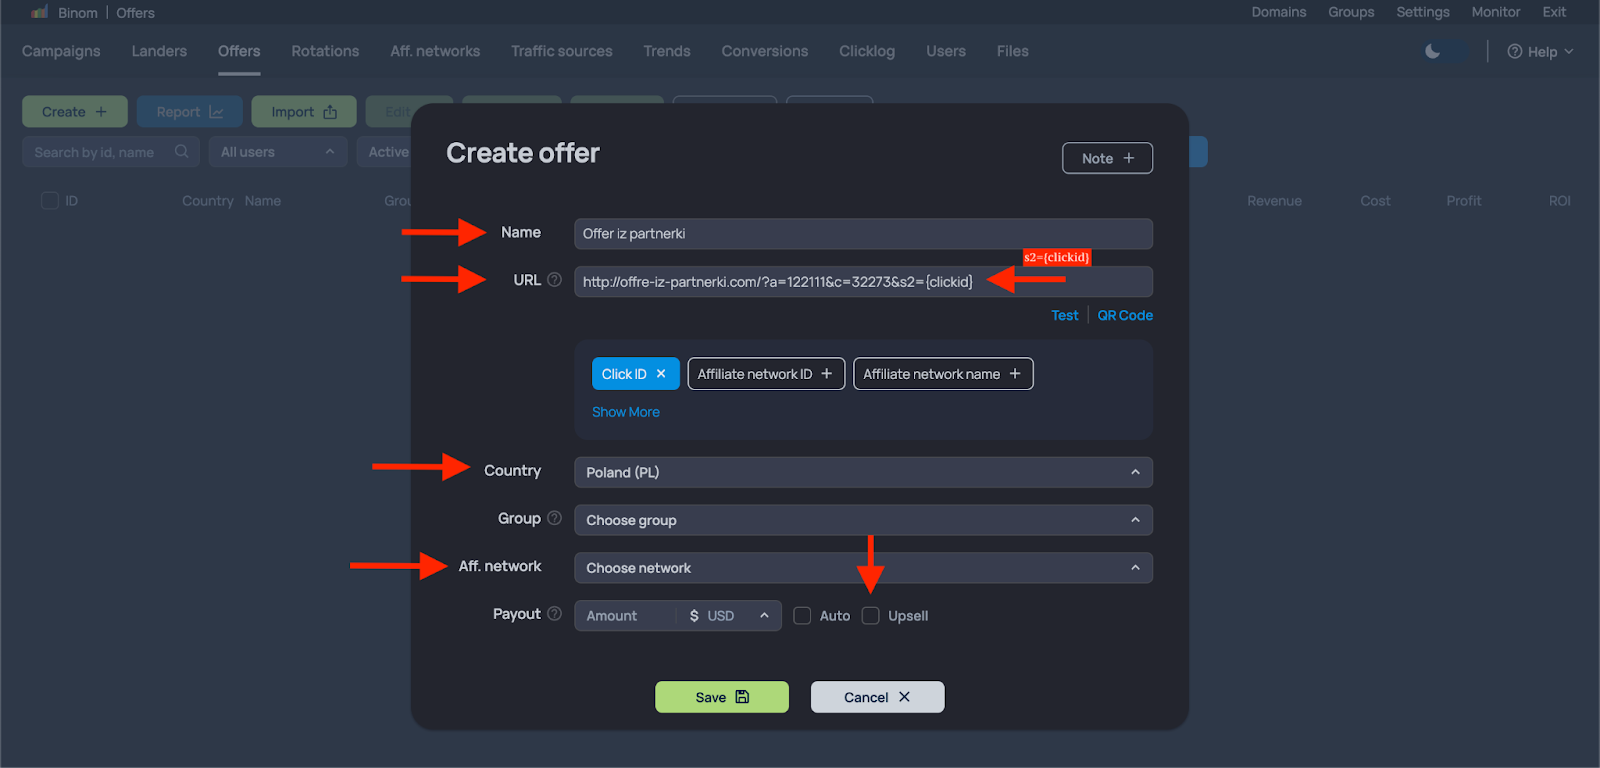
Enter the name of the offer and paste the offer link.
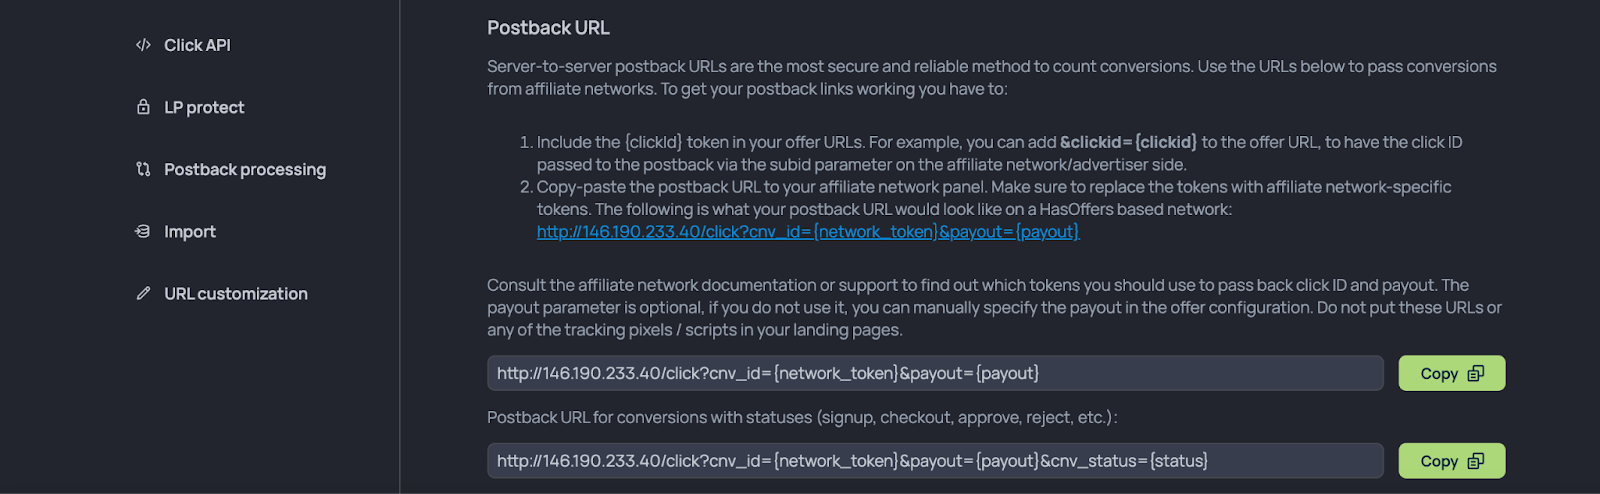
Pay attention to the parameters “s1” and “s2”. For detailed information on working with Postback, refer to the Binom help documentation:
After the `&s1=` parameter, add the `{clickid}` token. When a conversion occurs, the tracker will replace this token with a unique click ID. This click ID enables you to receive a post-back to the tracker when a conversion happens on the offer. Replace the `&s1=` parameter itself with `&s2=`. Note that some offer networks may not permit passing the click ID to `s1`.
Your link with the specified parameters should look like this:
http://offer-from-your-affiliate-network.com/?a=122111&c=32273&s2={clickid}
Choose the targeted country, the affiliate network, and the cost of conversion. Specify the conversion cost either manually or select “Auto”. If manually entered, the system will retrieve the cost data from your specified values. If “Auto” is selected, the conversion cost will be transferred automatically.
Thoroughly review the entered data and click on “Save” to confirm.
In the updated version of Binom, you can search by offer ID, select multiple groups, partner networks, and countries when applying filters. Also, like in landing pages, you can now generate specific reports for individual offers.
Landing Page Creation
Let’s move on to adding landing pages. Everything is similar to the previous steps.
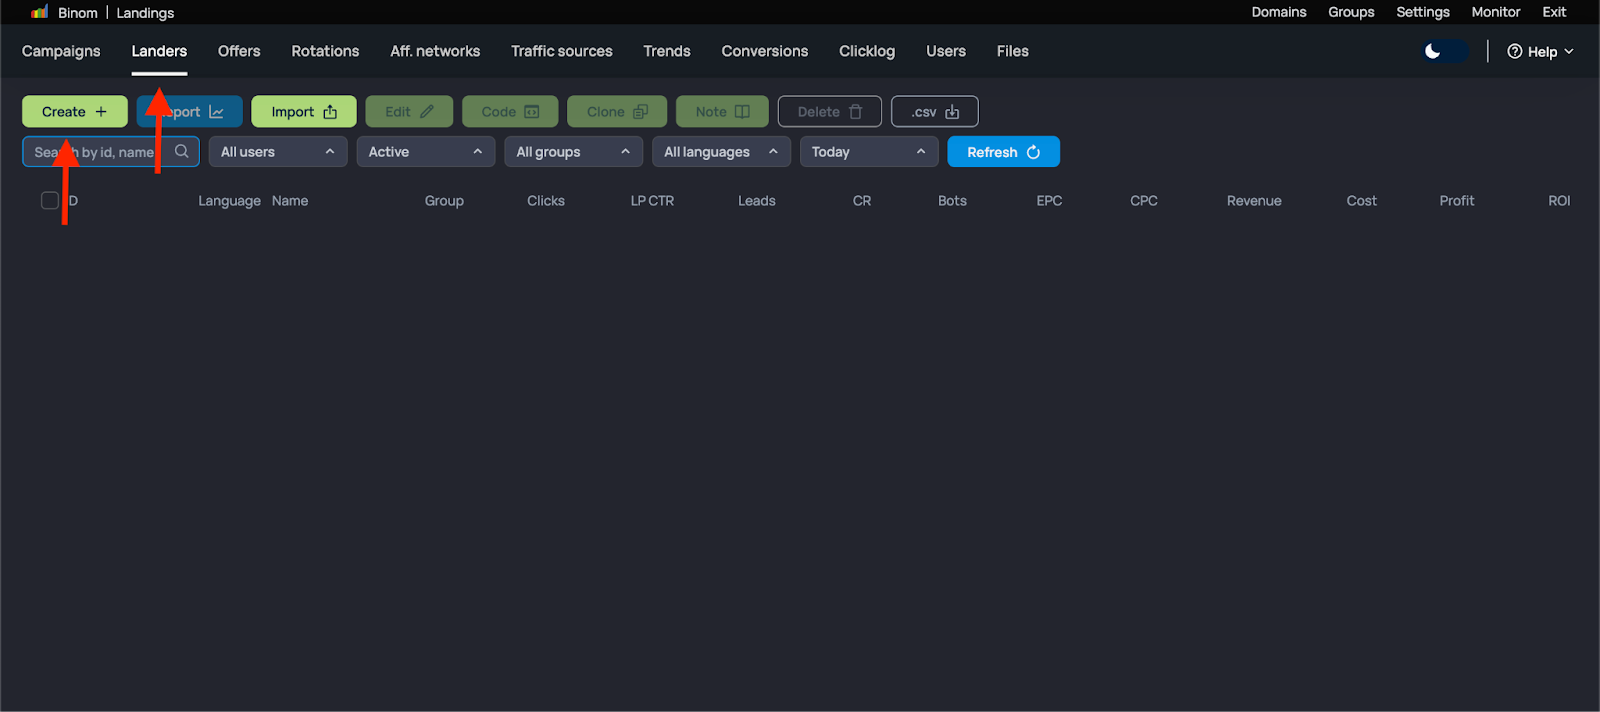
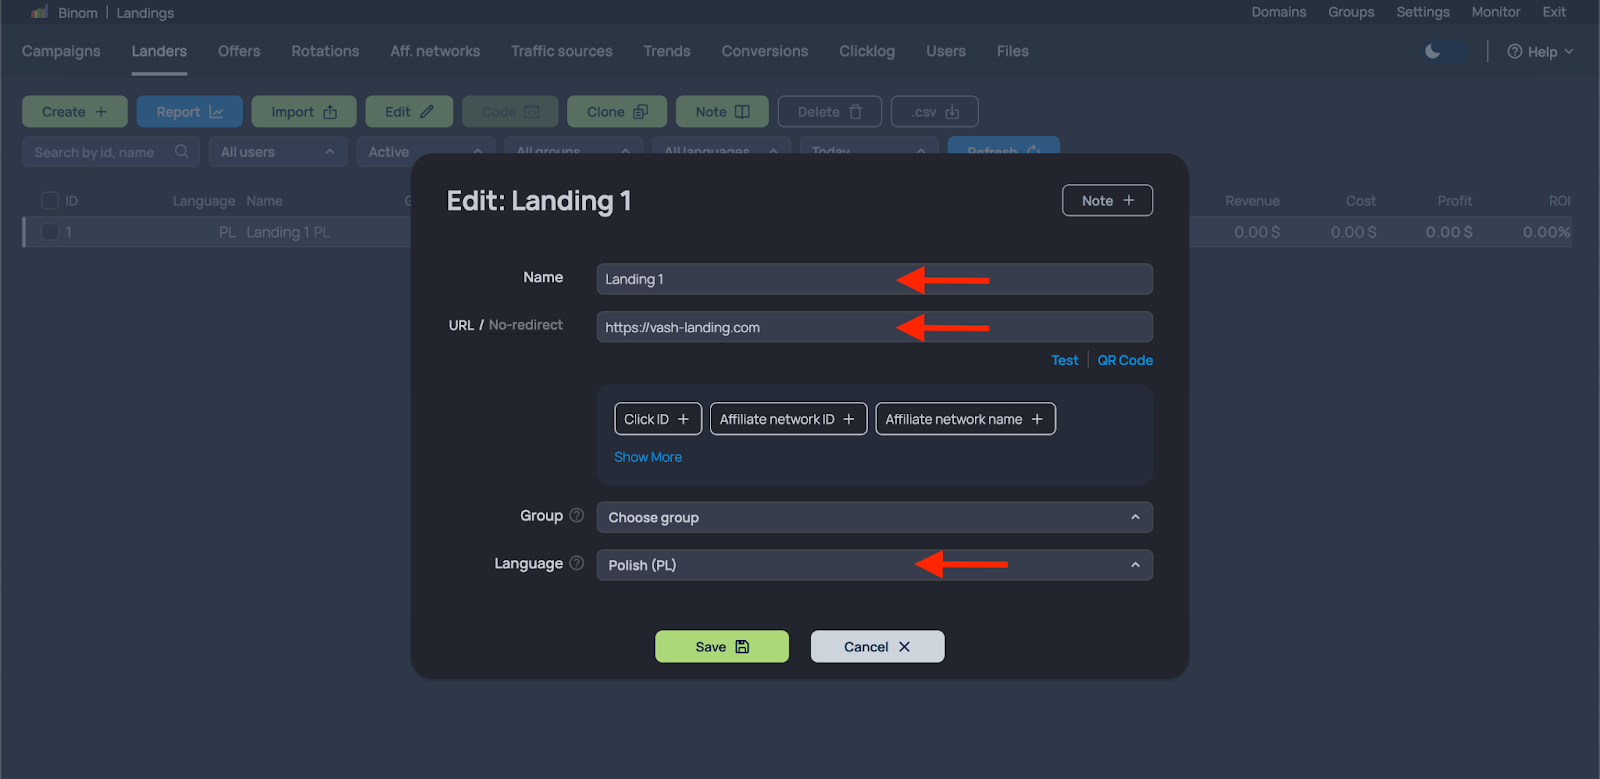
In the top menu, go to “Landers” and click on “Create” to initiate the process.
Next, enter the name of the landing page. Provide the domain and language for the landing page.
Click “Save” to confirm your entries.
Next, take the offer link and insert it in all the locations on the landing page where the user can navigate to the desired offer.

Let’s set up the post-back. Navigate to the “Settings” tab and select the appropriate post-back option. Specify the selected post-back in the settings of the affiliate network’s offer.
To add multiple landings at once, click on “Import.” A window will open. Copy and paste strings in the following format:
Name|URL[|Group|Language (EN)|Number of Offers on the Landing]
Each line corresponds to one landing page. Optional fields are specified in brackets [ ]. If you omit optional fields, the tracker will set empty values. After specifying all strings, click the “Import” button at the bottom to add the landing pages. No need to check the group ID when importing landings; the group name is sufficient.
In the updated version of Binom 2.0, a search by ID of a landing page has been added. It will help with navigation if you have thousands of webpages, and don’t have the imagination to come up with a unique name every time. It is also possible to select multiple groups/countries when filtering.
Also, when editing the integrated landings, the appeared code is highlighted, enhancing convenience for making edits.
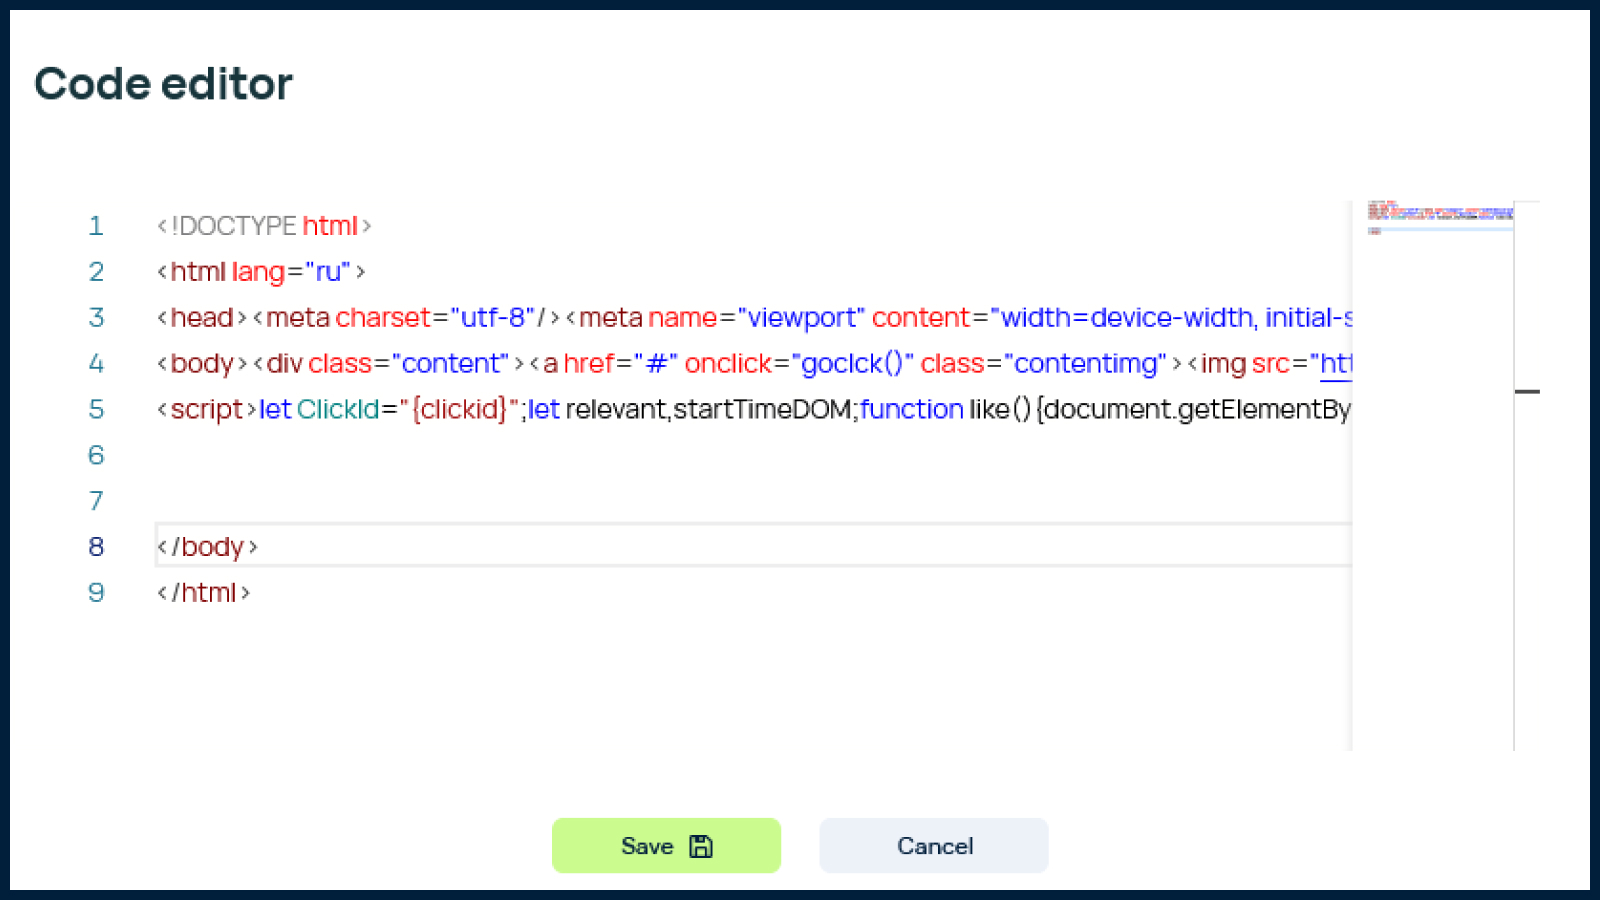
In the latest tracker version, adjustments have been made to parameters in integrated landings, such as changing `{lander}` to `{landing_id}`. To view available parameters, refer to the “Available Parameters” block when creating a landing page.
Furthermore, you now can generate a report on specific landings.
Landing page protection
Landings can be hidden and protected in the tracker. To implement this feature, go to the tracker settings. In the “LP Protect” section, copy the provided code. Paste this code at the beginning of your landing page’s PHP code. Ensure that the extension of your landing page is .php.
This feature safeguards landings from direct access by checking the time difference between a click through the tracker and the opening of a landing page. If the time exceeds the specified duration (default is 5 minutes), a blank page will be displayed instead of the landing page.
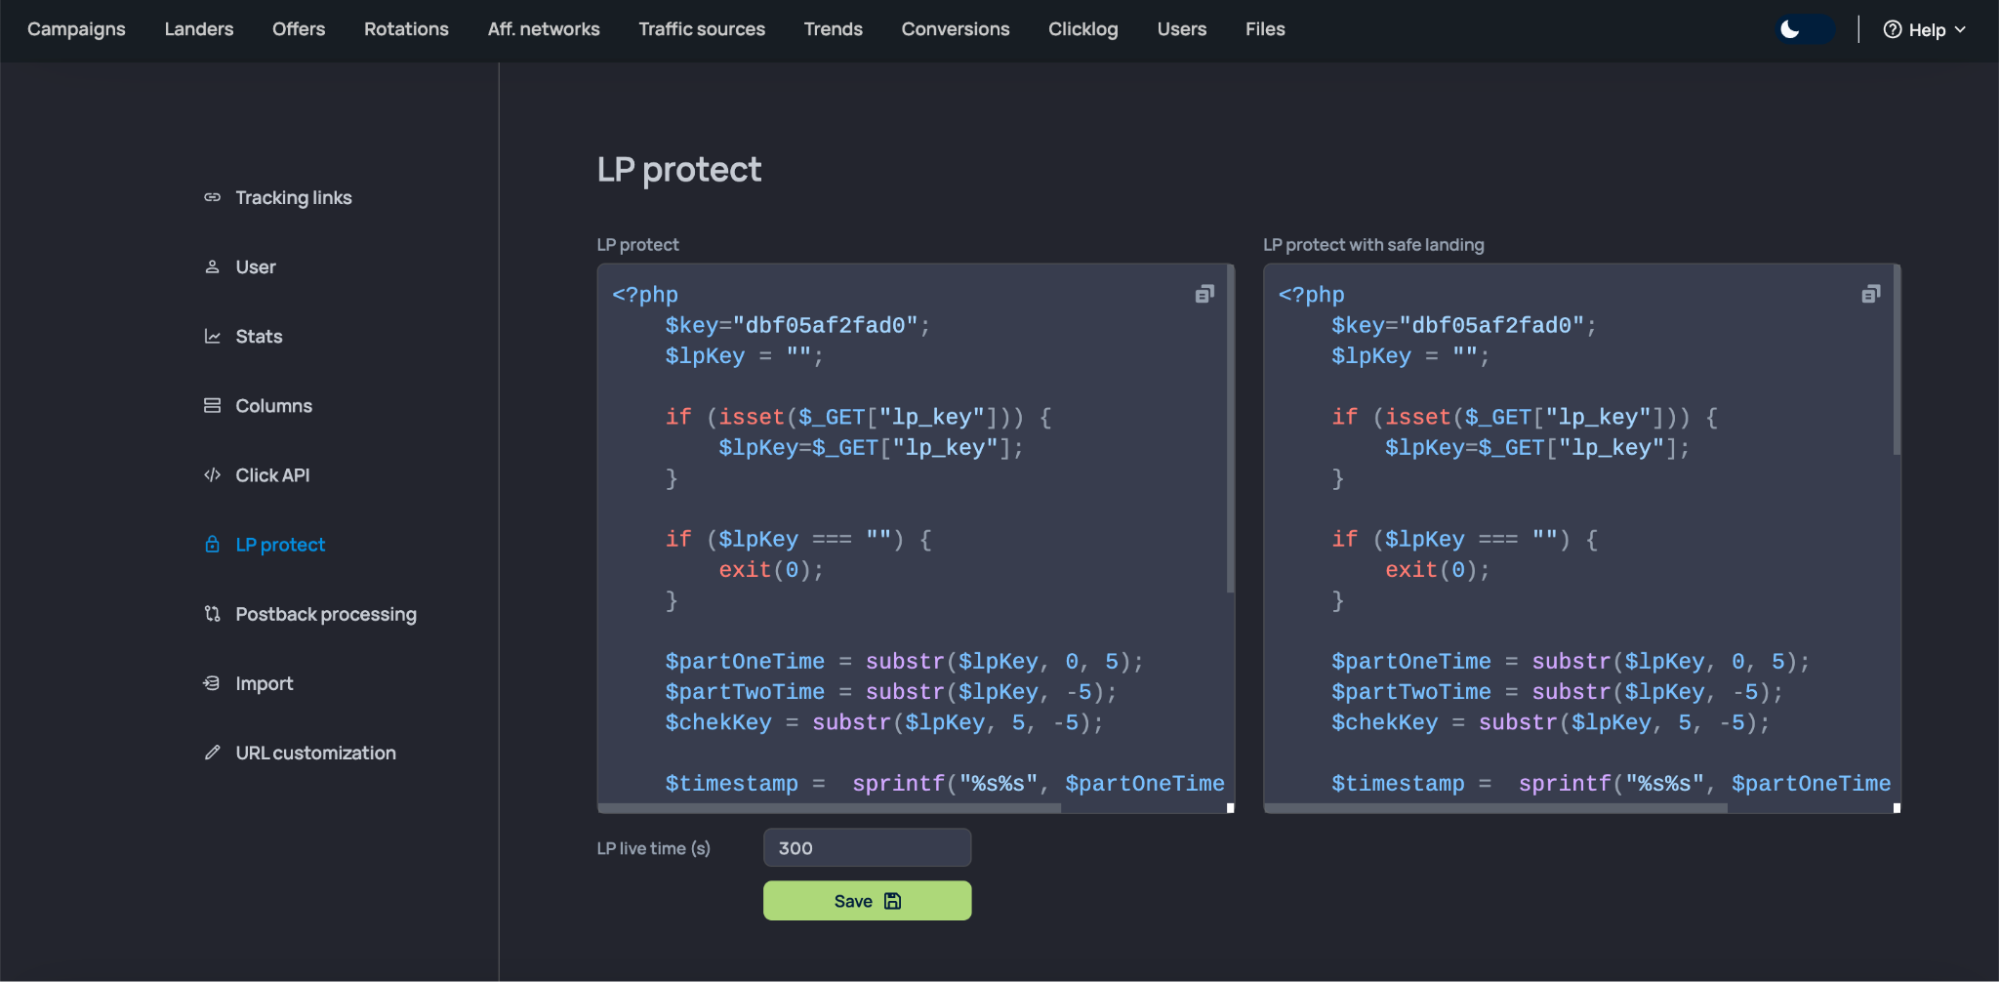
Now, if there is no click through the Campaign URL, your landing page will not be opened.
Campaign Setup
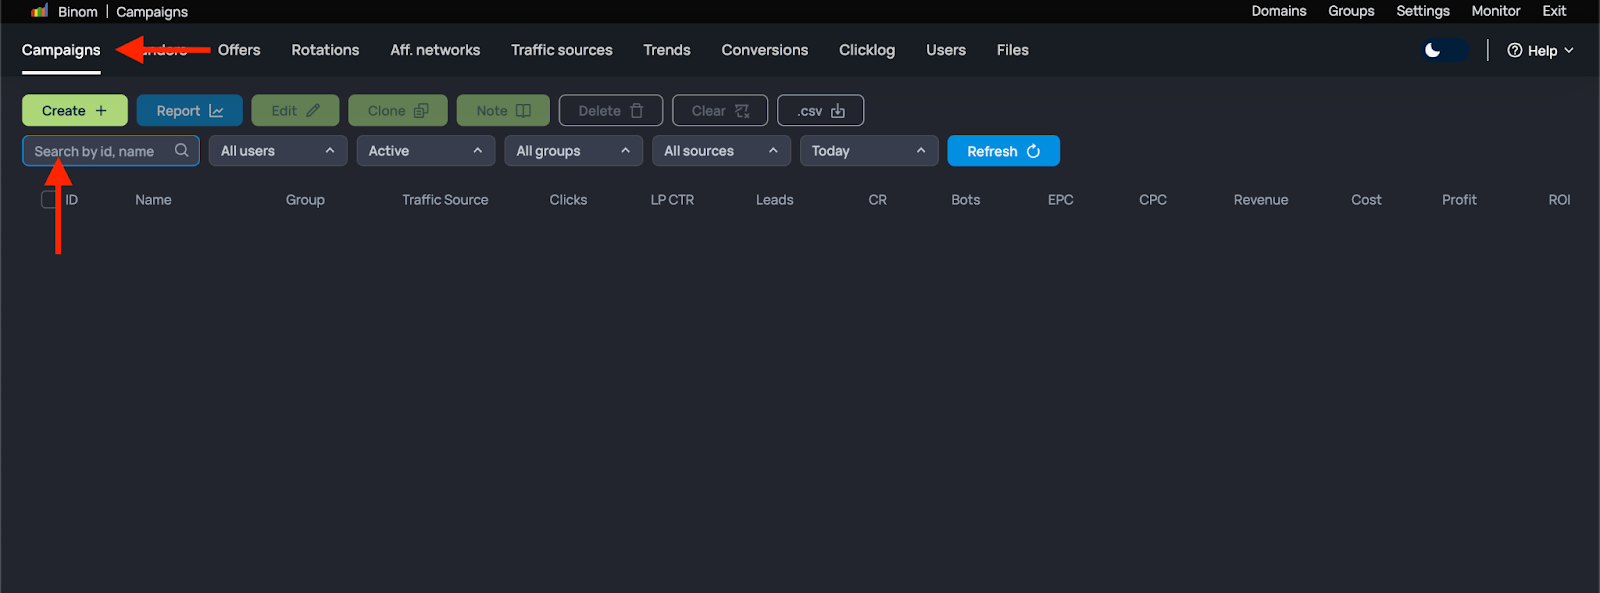
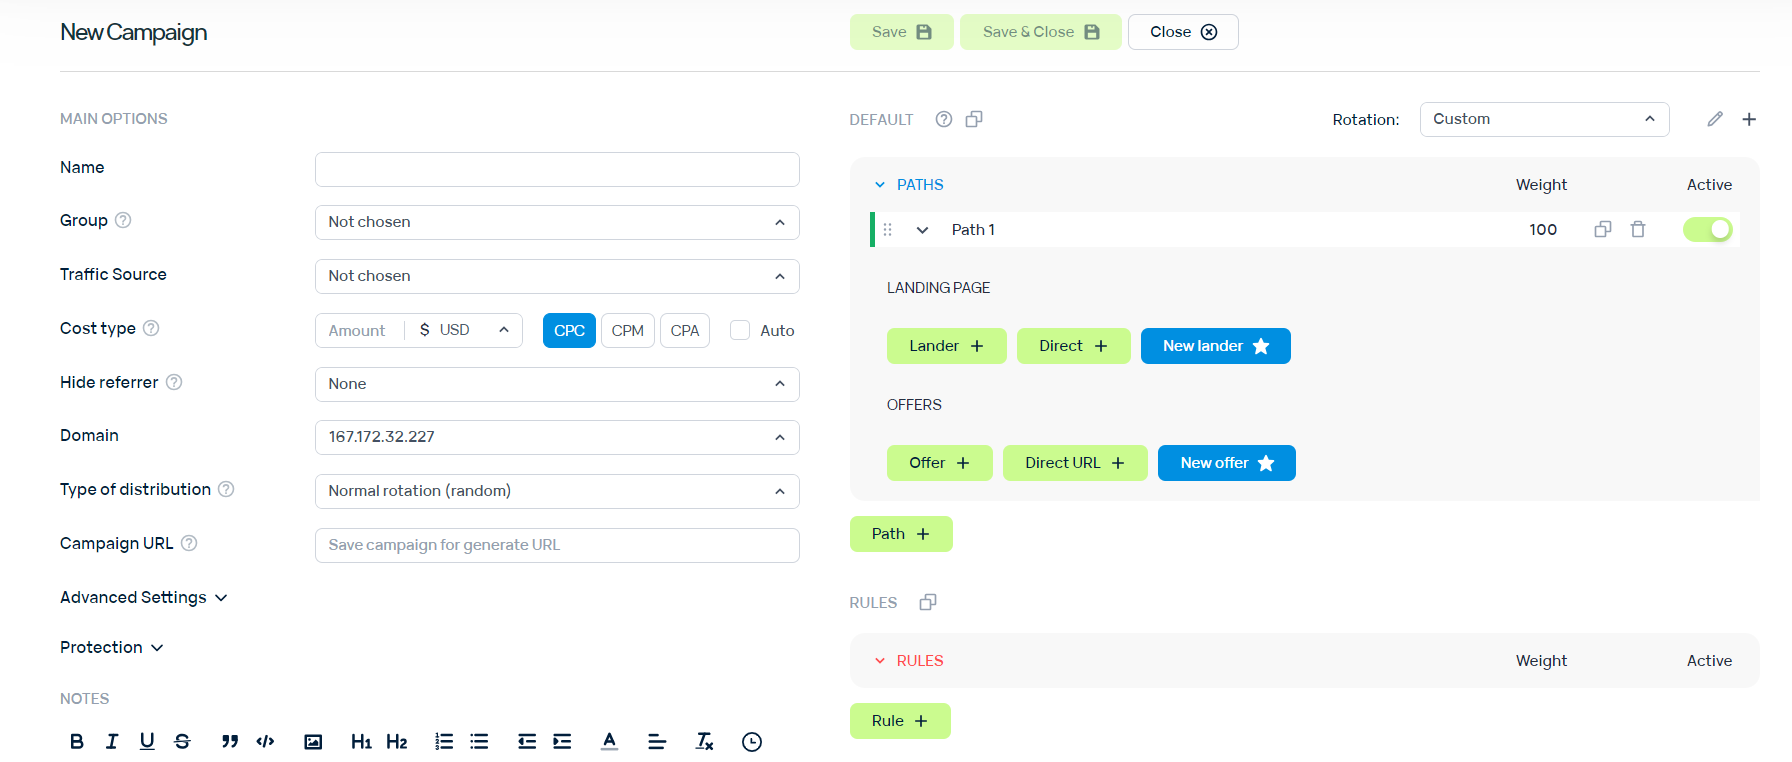
The last step is to set up the campaign. In the top menu, select “Campaigns” and click on “Create”.
Specify the campaign name and choose the desired source (in our case, Facebook*).
In the settings, specify the added landing page and the added offer.
Optionally, set up rules to filter incoming traffic. The tracker provides more than 30 parameters for filtering, allowing you to easily add any necessary parameters for your specific case. In this instance, enable filters based on GEO and device type.
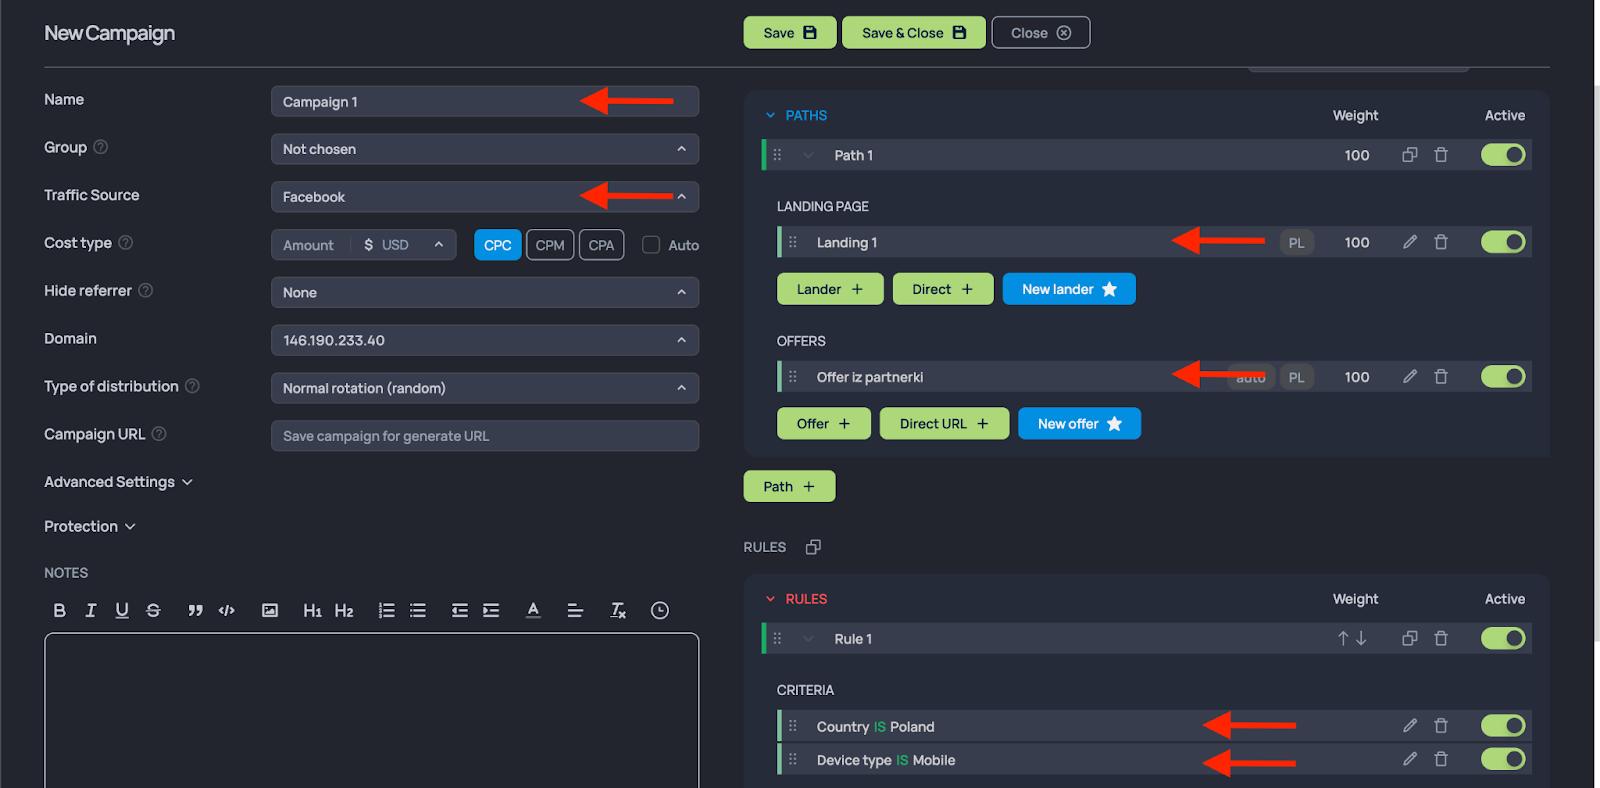
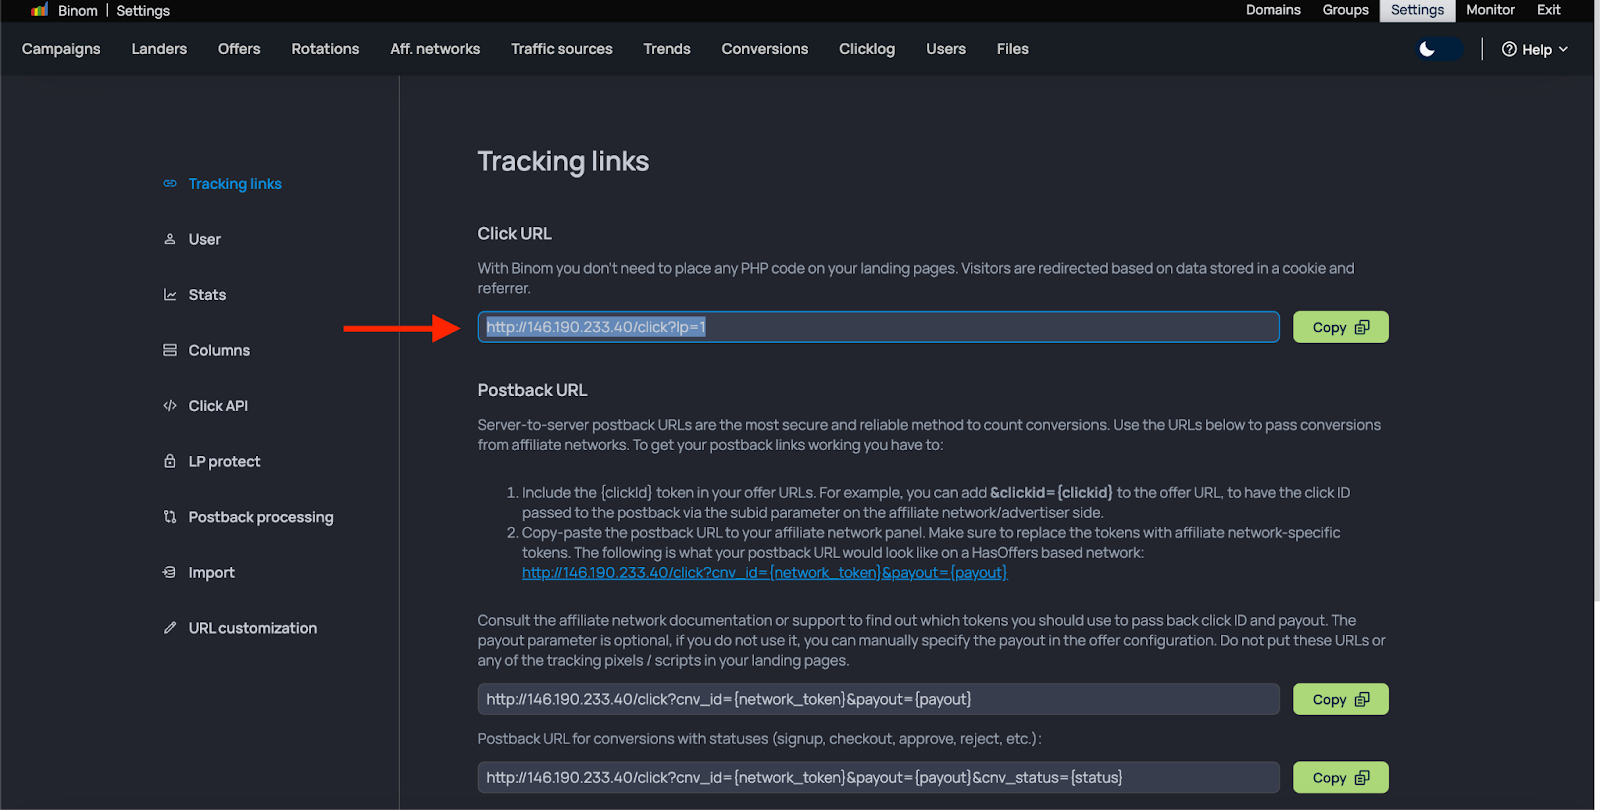
The link generated in the “Campaign URL” field will be used to direct your traffic.
In the updated tracker version, improvements include the ability to search for campaigns by ID and enhanced data filtering for all campaigns. You can now select multiple groups or sources.
In addition, there is a new Type of distribution scheme called “top to bottom”.
The interaction scheme operates with the example of 2 paths, each consisting of 2 landers and 2 offers. This means the user will sequentially navigate through each of the landings in the following order:
1 path — 1 lander
1 path — 2 lander
2 path — 1 lander
2 path — 2 lander
Users will navigate through the landers and, subsequently, to the offers one by one within the paths where these landings are situated.
Campaign links will be structured as domain.com/?=id-campaign. In Binom 2.0, you can mimic a “whitehat site” by adjusting the settings (Settings > URL Customization). Change “Click path” to “post” and “Campaign key” to “id”. The resulting link will be: domain.com/post?id=looks-like-a-post-but-is-a-lander.
In just 10 minutes, we connected to the tracker, created a landing page, added a traffic source, an offer, and a campaign. The final step is to set up an advertising campaign and start generating positive results.
Assigning a domain to hosting
The last step in configuring a campaign in the tracker is assigning a domain to the hosting. In the updated Binom 2.0, the process of adding additional domains has been streamlined. No need to use the console anymore. Simply head to the “Domains” tab, where you can add a list of domains. The service will handle all server settings automatically and issue an SSL certificate for you.
Reporting
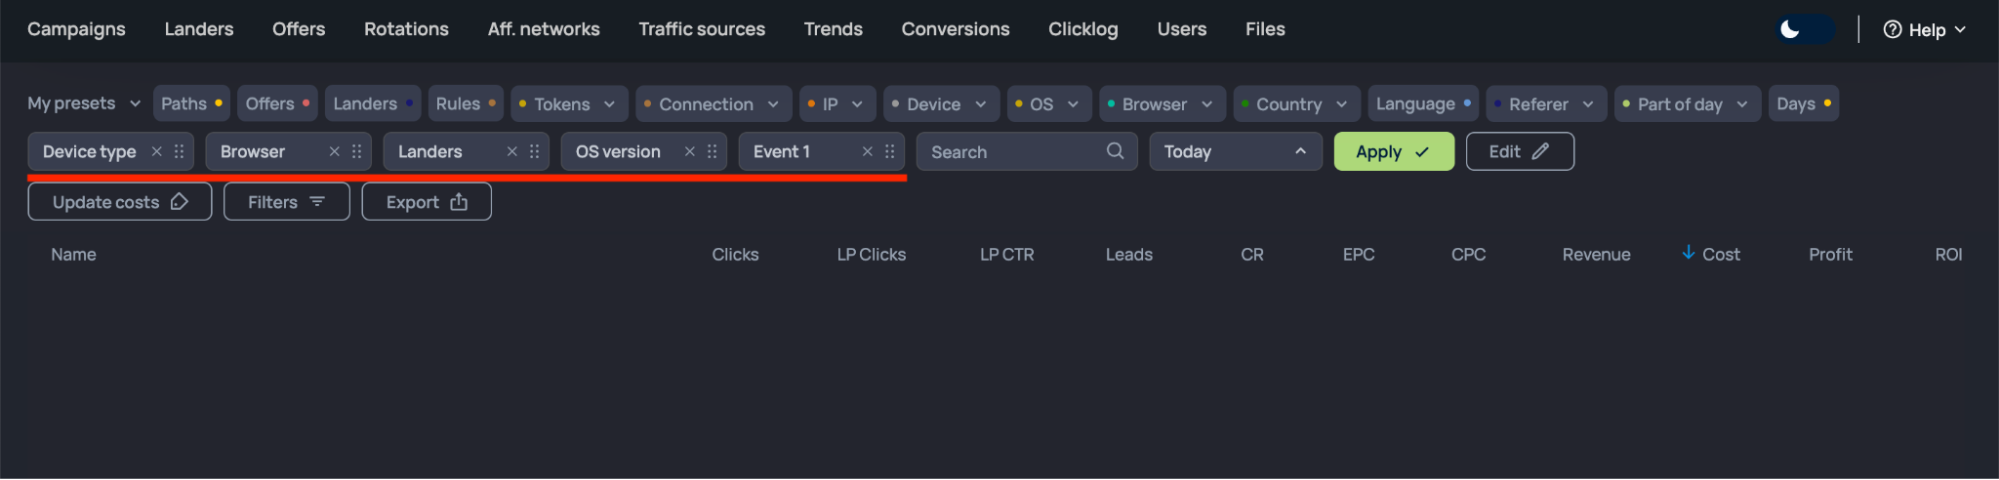
In Binom 2.0, data collection and analytics (Reports) have undergone significant improvements for enhanced convenience. You can now group the report by up to 5 parameters, a notable increase from the previous limit of 3. Now, the drag-and-drop function is available for easy customization of data grouping.
These advanced reporting features empower you to draw more accurate conclusions about campaign effectiveness and eliminate the need to export click logs and process data in other analytical programs, making the process much smoother.
When it comes to clicklogs, Binom 2.0 introduces the convenience of multi-selection in the campaign filter, allowing you to clean the statistics or upload the log even faster.
Additionally, the new version of the tracker boasts about 40 basic metrics, along with 30 events and 30 tokens. Here are some of the metrics:
- Campaigns
- Campaigns Group
- Path
- Offers
- Landers
- Rules
- Rotations Expand
- Aff. network
- City
- Country
- CPC
- Device
- ISP
- IP
- Browser
- OS
- Language
- Referer
- Day of week
- Hour of day
- Days
- Tokens
- Conversion status
- Uniqueness
- Events
- Leads
Why Binom is not only a tracker but also a TDS
Binom’s traffic distribution functionality goes beyond being just a tracker; it also serves as a Traffic Distribution System (TDS). Clicks can be distributed to main paths, landings, offers, and based on specified rules. To utilize this feature, press “Rule+” when creating or editing a campaign. This allows you to leverage the extensive traffic distribution capabilities within Binom.
Rules in Binom consist of criteria, representing specific conditions such as country, city, OS, etc. To add criteria to a rule, click the “Add criteria” button inside the rule.
Rules are prioritized from top to bottom. Higher rules have higher priority. Rules can be adjusted in order using the “Weight” feature. Operations for Criteria:
- Between criteria is an AND operation (both conditions must be met).
- Within a criterion is an OR operation (any of the conditions must be met).
- Between rules in a campaign is an OR operation.
Binom provides over 20 criteria for precise control, ranging from browser version and OS to HTTP request headers and day of the week. For detailed information on working with rules and traffic distribution, refer to the Binom documentation.
Other features of Binom 2.0
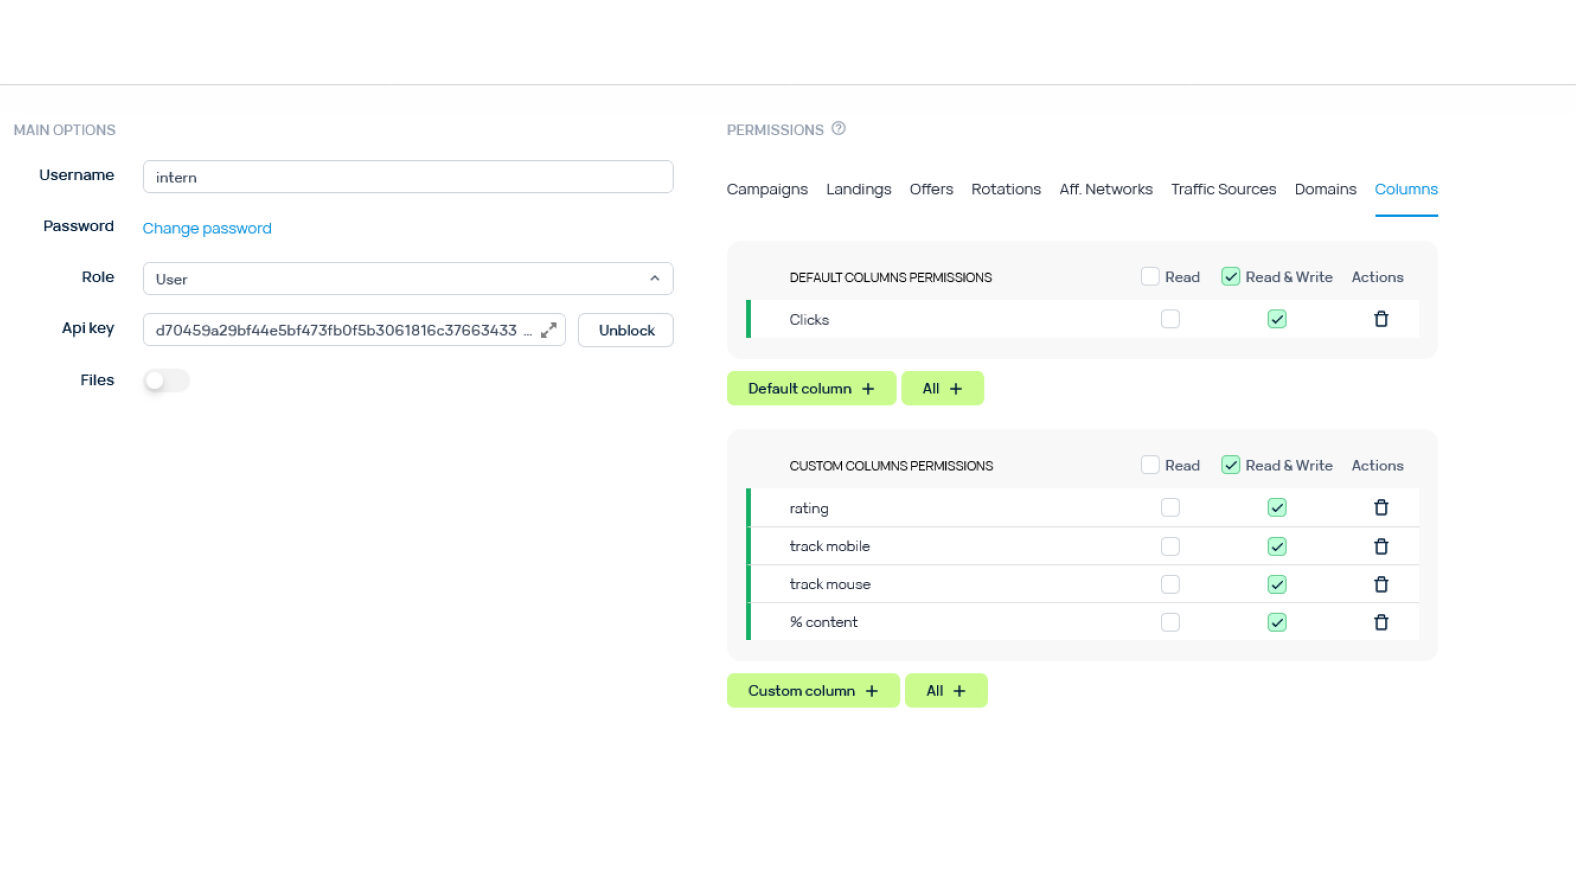
Users
A new feature in this section allows users to hide columns selectively. For instance, you can hide profit information from trainees, leaving only the essential columns visible for their work. This enhances user-specific customization for improved workflow efficiency.
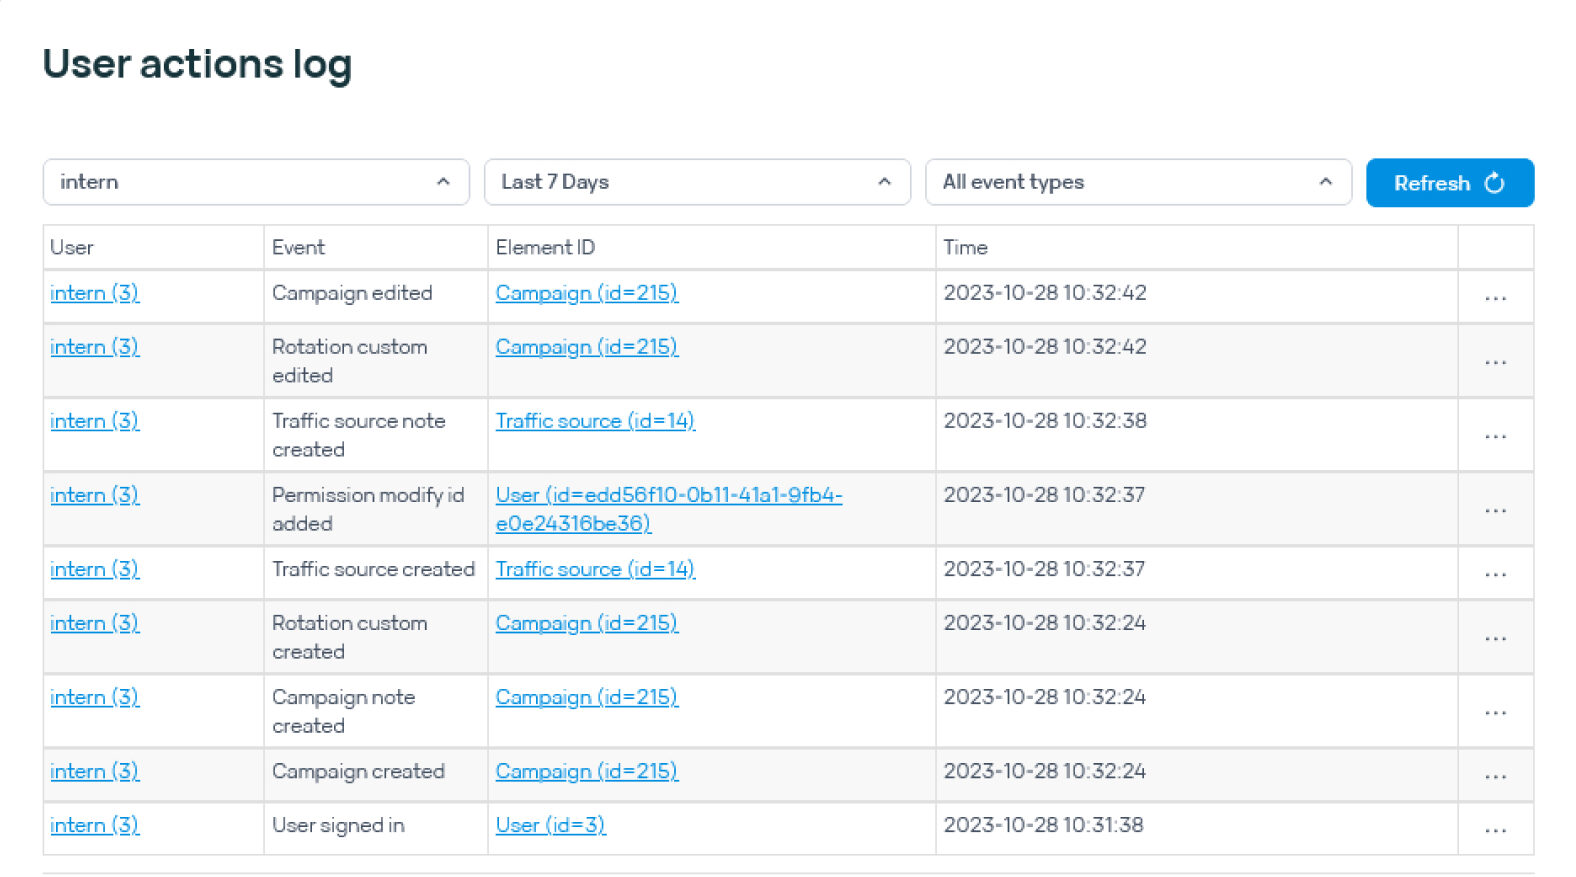
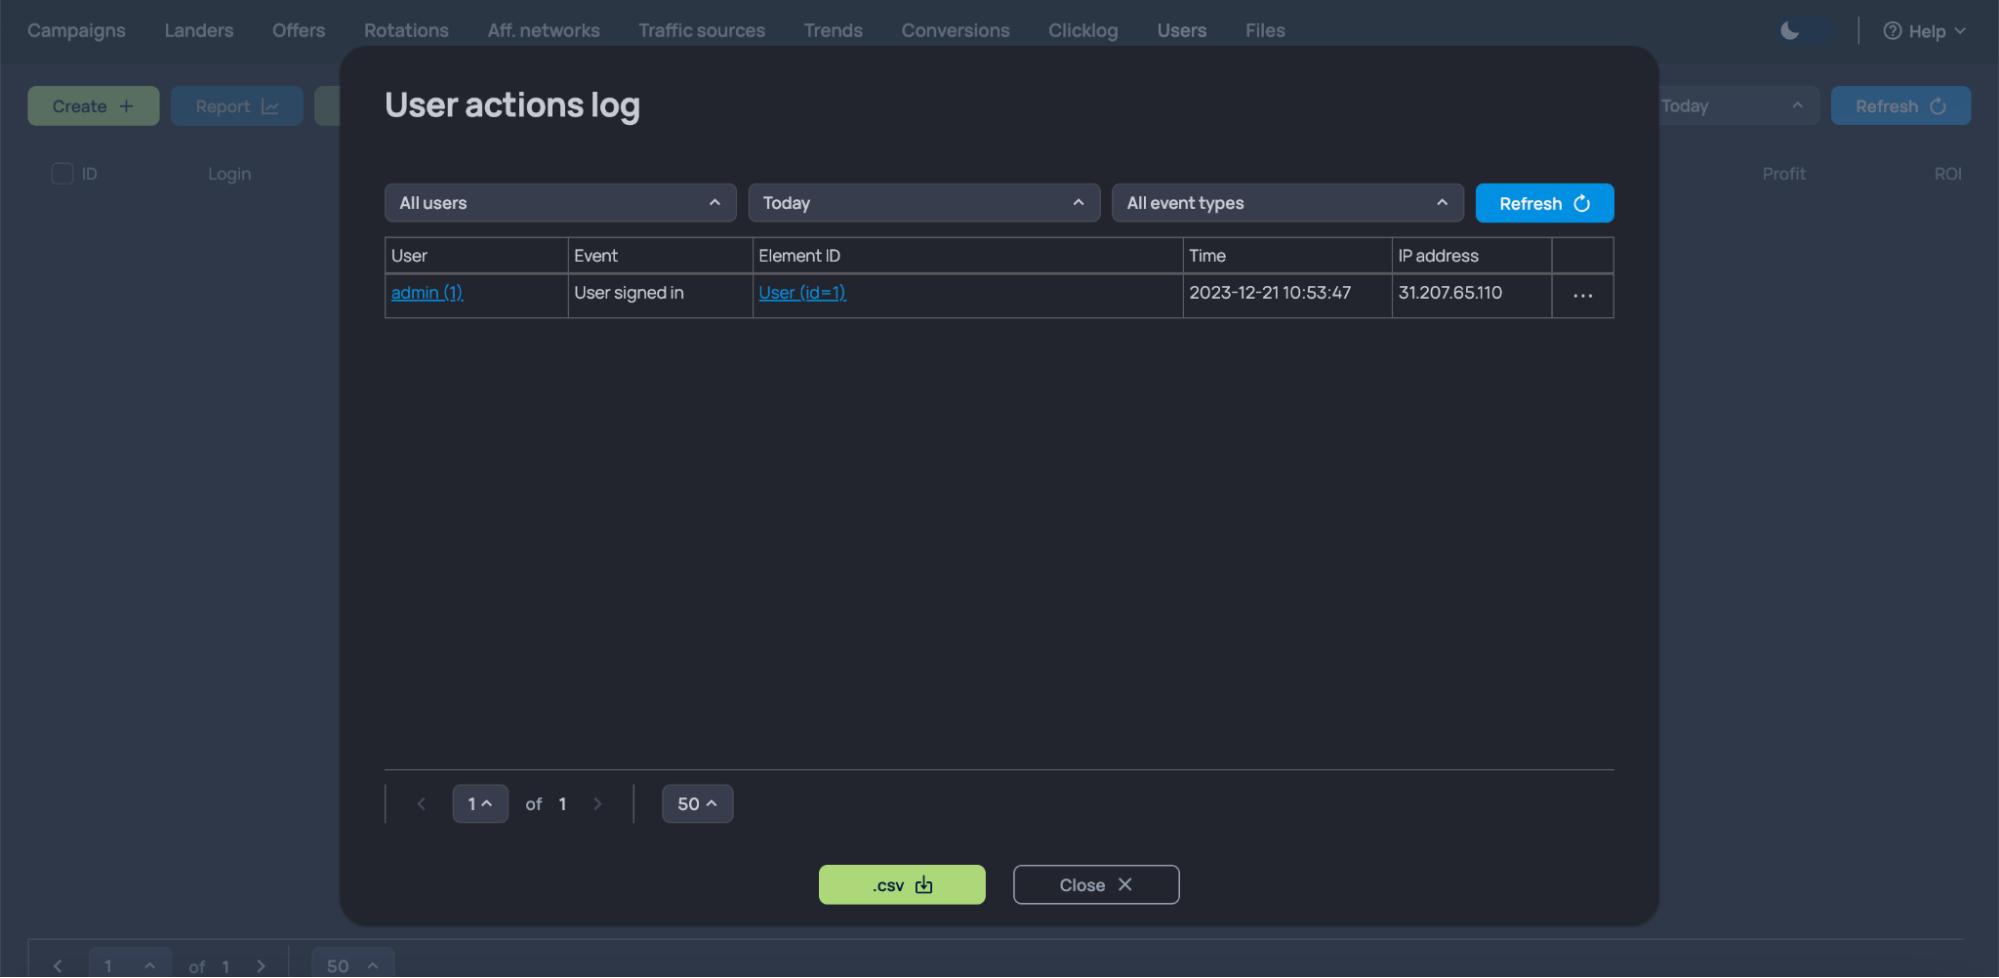
In the Users section, a valuable new feature is the log of user actions (Users > logs). This feature facilitates tracking all team actions, enabling quicker error detection. Additionally, it allows users to swiftly navigate to a changed item with just one click.
For more information, refer to the details provided in the Binom manual.
Files
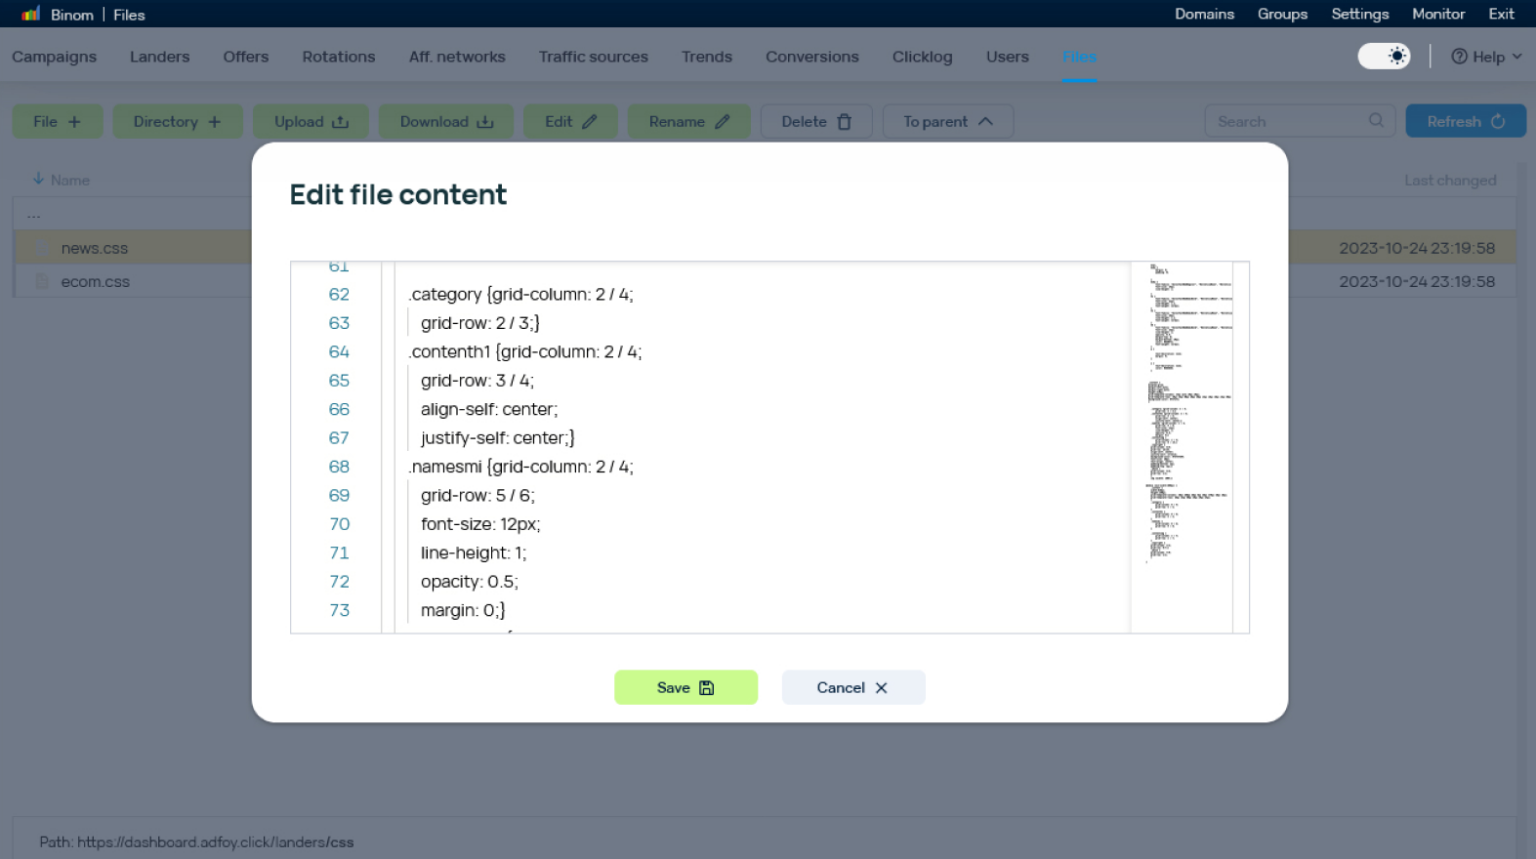
In the updated Binom 2.0 admin area, users can now create directories within the admin area. It is possible to upload or download files directly from the admin area. The editor now supports code highlighting, eliminating the need to integrate third-party services for this purpose.
This feature is particularly beneficial when using an integrated landing page. Create a separate folder named “css” and upload all styles to this designated folder. When uploading a landing page, ensure to use only the index file and images. By organizing styles in a separate folder and using only essential files during landing page upload (index file and images), you streamline the process, making it more convenient for making widespread design changes to your landings.
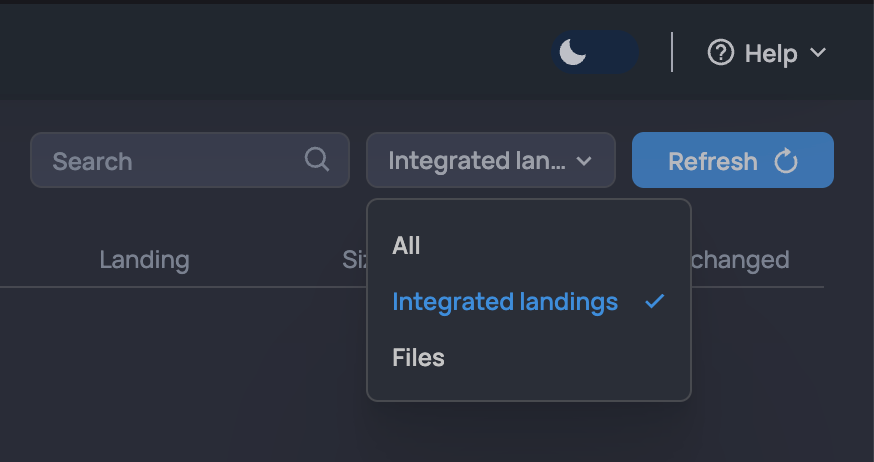
To find information on integrated landings, apply the filter “integrated landings” in the Files section. Search by ID or name of the desired landing.
For further details on using Files, refer to the tracker’s manual.
Events
In Binom 2.0, the number of events has been increased to 30, providing more flexibility. This enhancement allows for easy recording of user activity, conducting bot checks, and setting separate events for actions like a subscription to push notifications and interactions with chatbots. For detailed insights into the expanded functionality of the Events section, refer to the company’s blog.
Binom 2.0 status schemes
In the updated tracker version, a comprehensive constructor for processing lead statuses is now available at (Settings > Postback processing). You can upload an e-commerce status scheme (details explained in the dedicated manual) suitable for e-commerce and nutra. This scheme serves as a foundation for creating additional schemes for various niches like SMS subscriptions, SP-offers, or gambling. Status schemes can be linked to specific affiliate networks or campaigns.
To maintain clarity, consider allocating a pool of events exclusively for use in status schemes and refrain from using them elsewhere.
Customizing status schemes
Let’s explore examples of setting up schemes for various verticals and affiliate programs. To facilitate comprehension, we’ll use the following references: the tracker domain — trackdomain.com, and Click_path — click.
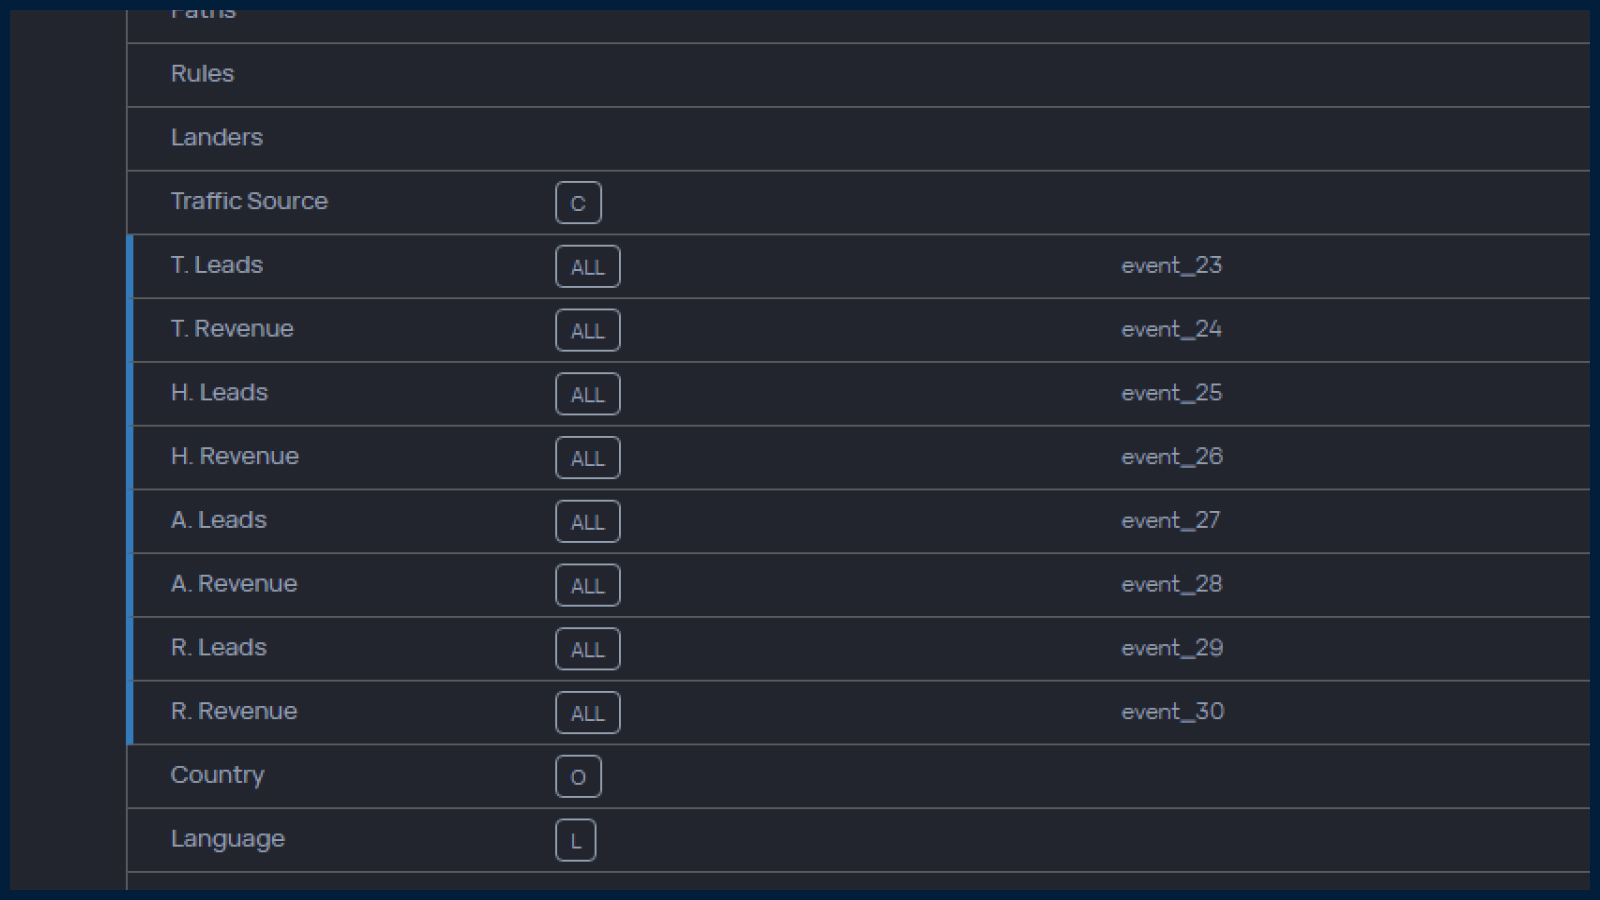
When adding an e-commerce status scheme to the tracker, the following columns will be automatically added, or you can configure them manually:
- Hold Leads (H. Leads — event_25)
- Hold Revenue (H. Revenue — event_26)
- Approve Leads (A. Leads — event_27)
- Approve Revenue (A. Revenue — event_28)
- Rejected Leads (R. Leads — event_29)
- Rejected Revenue (R. Revenue — event_30)
Example of status scheme for Nutra
For more analytics, let’s add columns for Trash Leads. Trash Leads (T. Leads — event_23, format 99) and Trash Revenue (T. Revenue — event_24, format $99). As a result, we have a pool of events from 23 to 30.
EVERAD
The affiliate network has 4 lead statuses — pending, approved, rejected, and trash. We will send our clickid in the sid1 label.
- On the tracker side, load Everad settings (Aff. Networks > Create > Load from catalog > Everad). Take the Postback URL https://trackdomain.com/click?cnv_id={sid1}&payout={payout}&cnv_currency={currency}&cnv_status={status} and copy it to the global postback settings on the Everad side (https://dashboard.everad.com/campaigns/global-postback/).
- Create a lead processing scheme (Settings > Postback processing > Status scheme +). Let’s call it “Nutra — Everad”.
2.1 Apply for. Choose the campaigns this scheme will be used for. In our case, select Affiliate networks > Everad.
2.2 Create 4 statuses under Conversion Status Values — pending, approved, rejected, and trash.
2.2.1 We set up the logic of processing leads with the status “pending”, in our case these are all new leads. Since the lead is in “processing”, we pass the data to Hold Leads (H. Leads — event_25) and Hold Revenue (H. Revenue — event_26). All post-backs automatically set conversion from 0 to 1 and payout, so we force these values to zero in this status.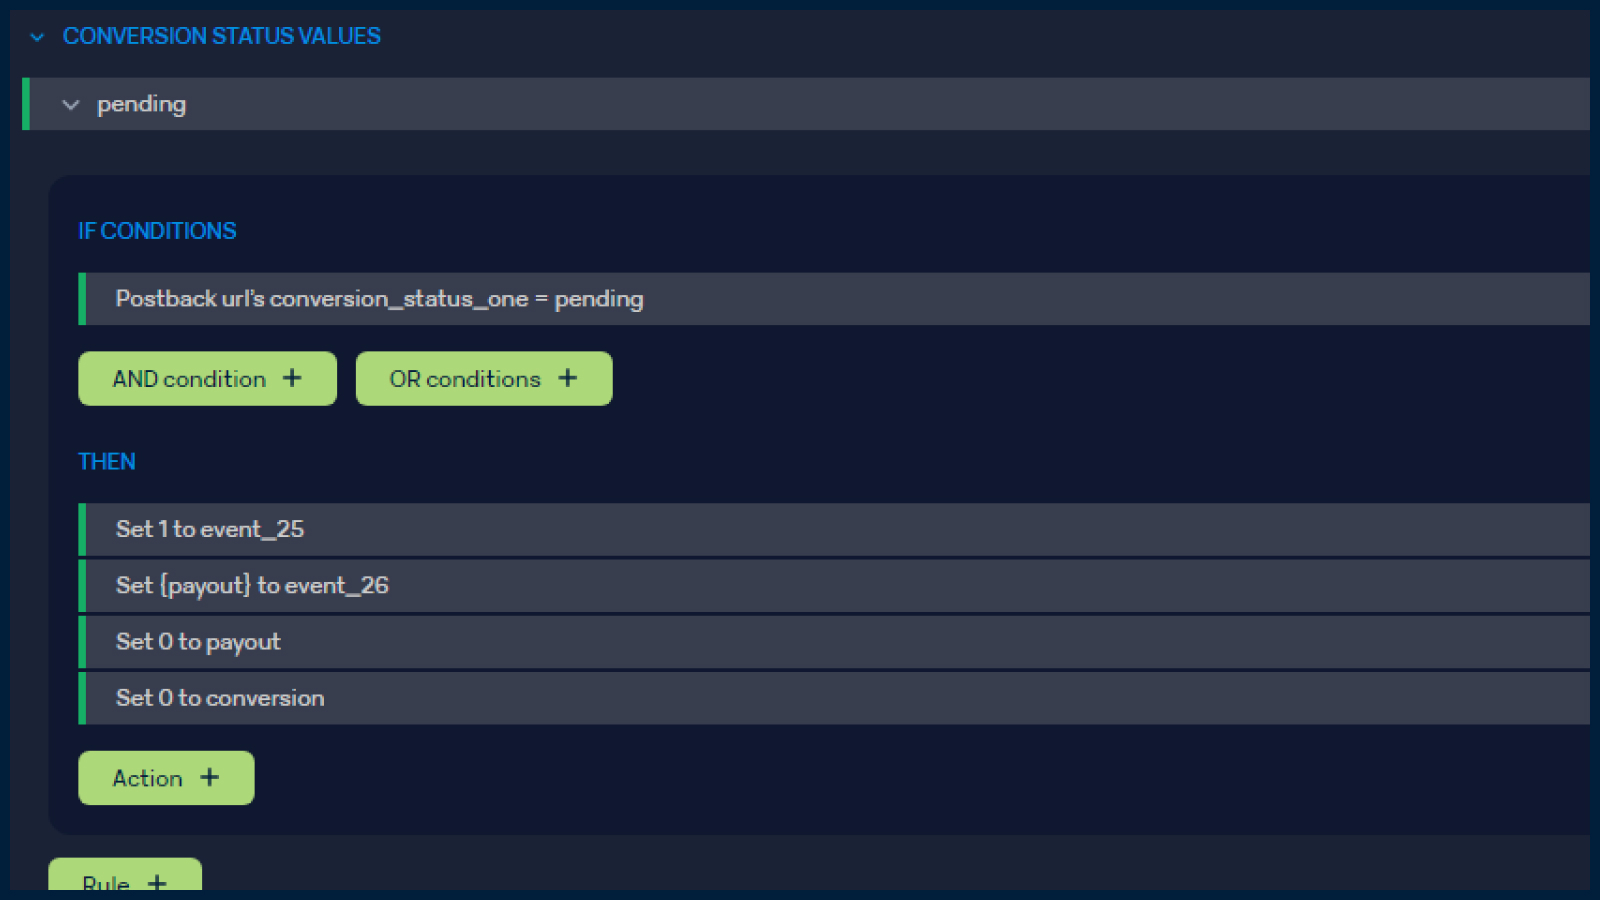
2.2.2 Set up the logic of work for the approved status, when the affiliate network has successfully processed a lead. Zero values in the Hold Leads (H. Leads — event_25) and Hold Revenue (H. Revenue — event_26) statuses, set values in the Approve Leads (A. Leads — event_27) and Approve Revenue (A. Revenue — event_28) statuses.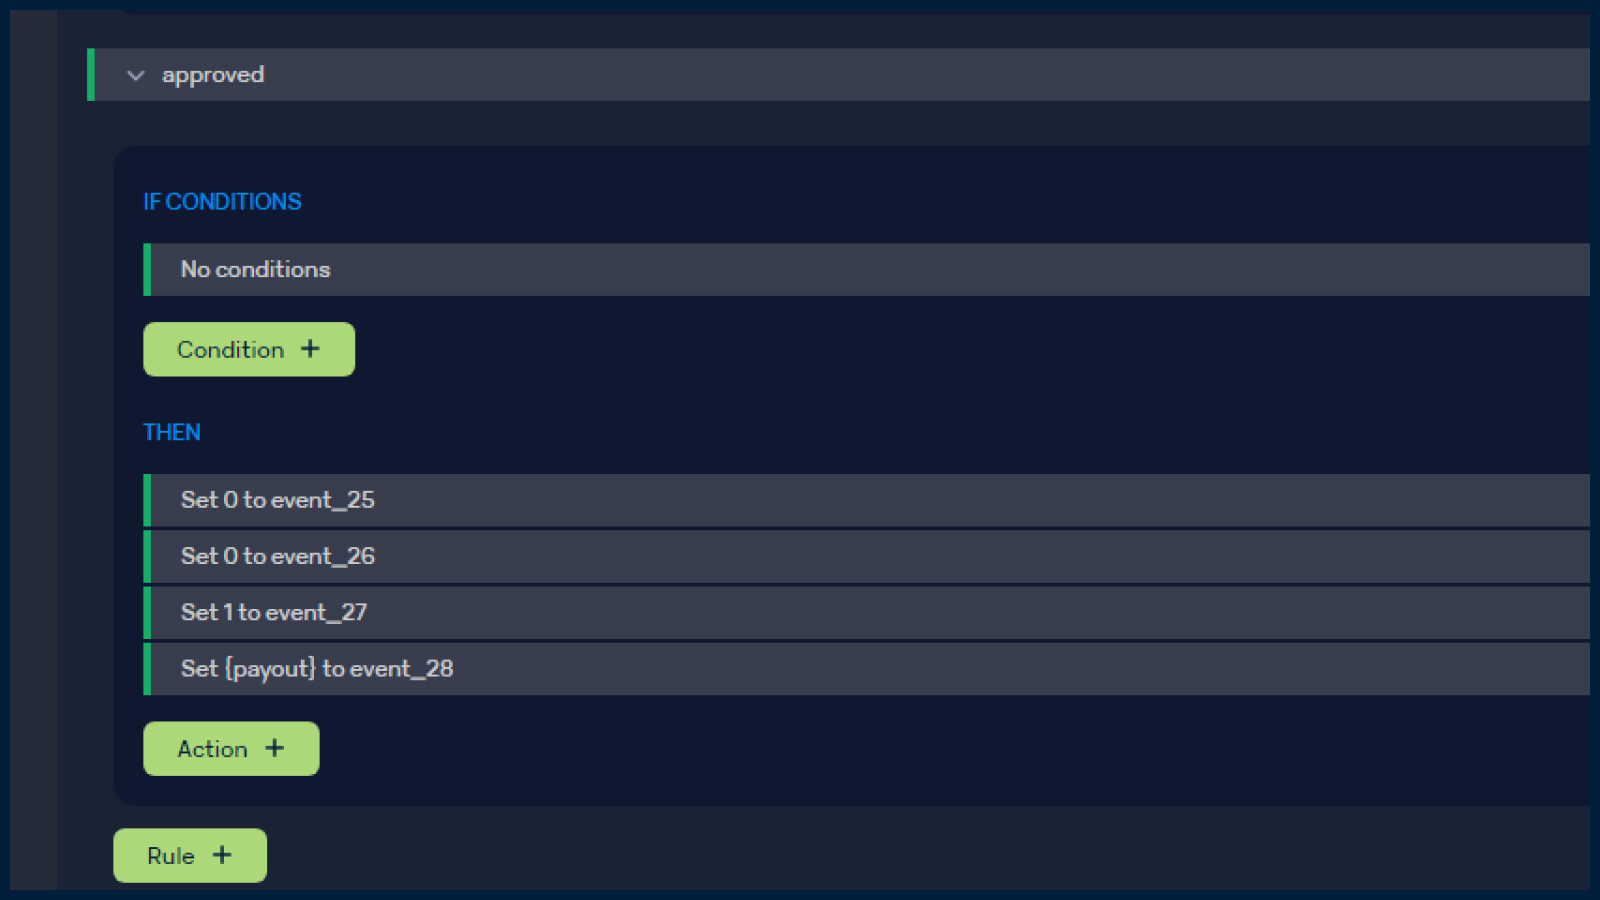
2.2.3 Set up the logic of work for the rejected status, when the affiliate network has rejected a lead. The status can change both from a lead in processing and from a confirmed lead. Therefore, we reset the values in the Hold Leads (H. Leads — event_25), Hold Revenue (H. Revenue — event_26), Approve Leads (A. Leads — event_27) and Approve Revenue (A. Revenue — event_28) statuses, as well as the payout and conversion values. Put values in the statuses Rejected Leads (R. Leads — event_29), Rejected Revenue (R. Revenue — event_30).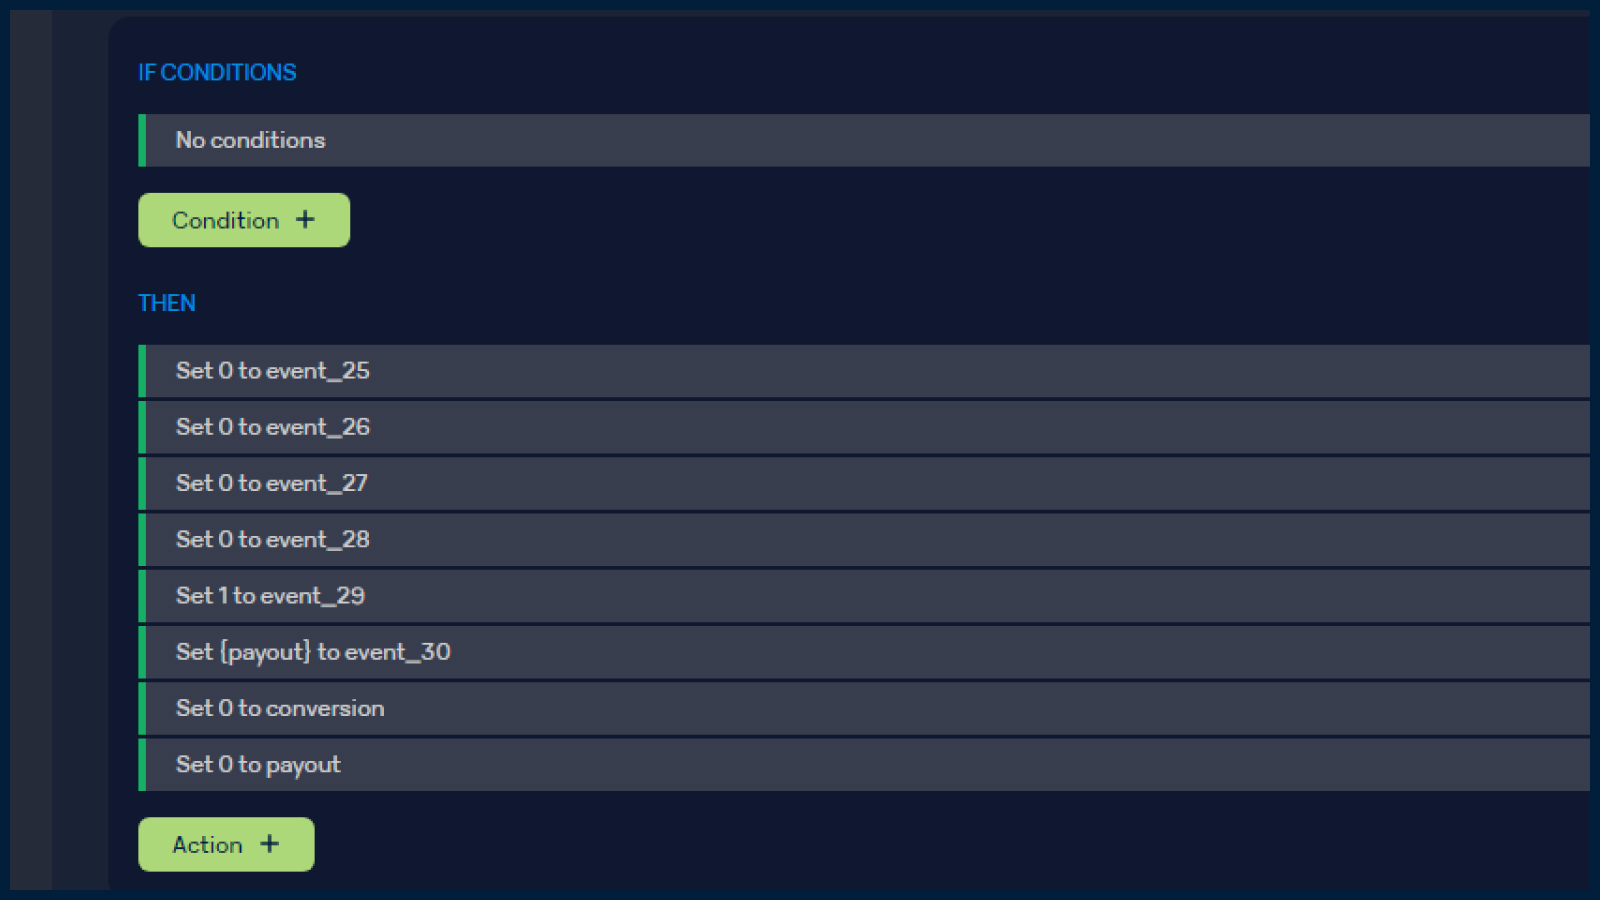
2.2.4 Set up the logic of work for trash status, when the affiliate network has defined a lead as low-quality. The status can be set immediately, or after the lead is processed. Therefore, we reset values in the Hold Leads (H. Leads — event_25) and Hold Revenue (H. Revenue — event_26) statuses, as well as payout and conversion values. Set values in the Trash Leads (T. Leads — event_23) and Trash Revenue (T. Revenue — event_24) statuses.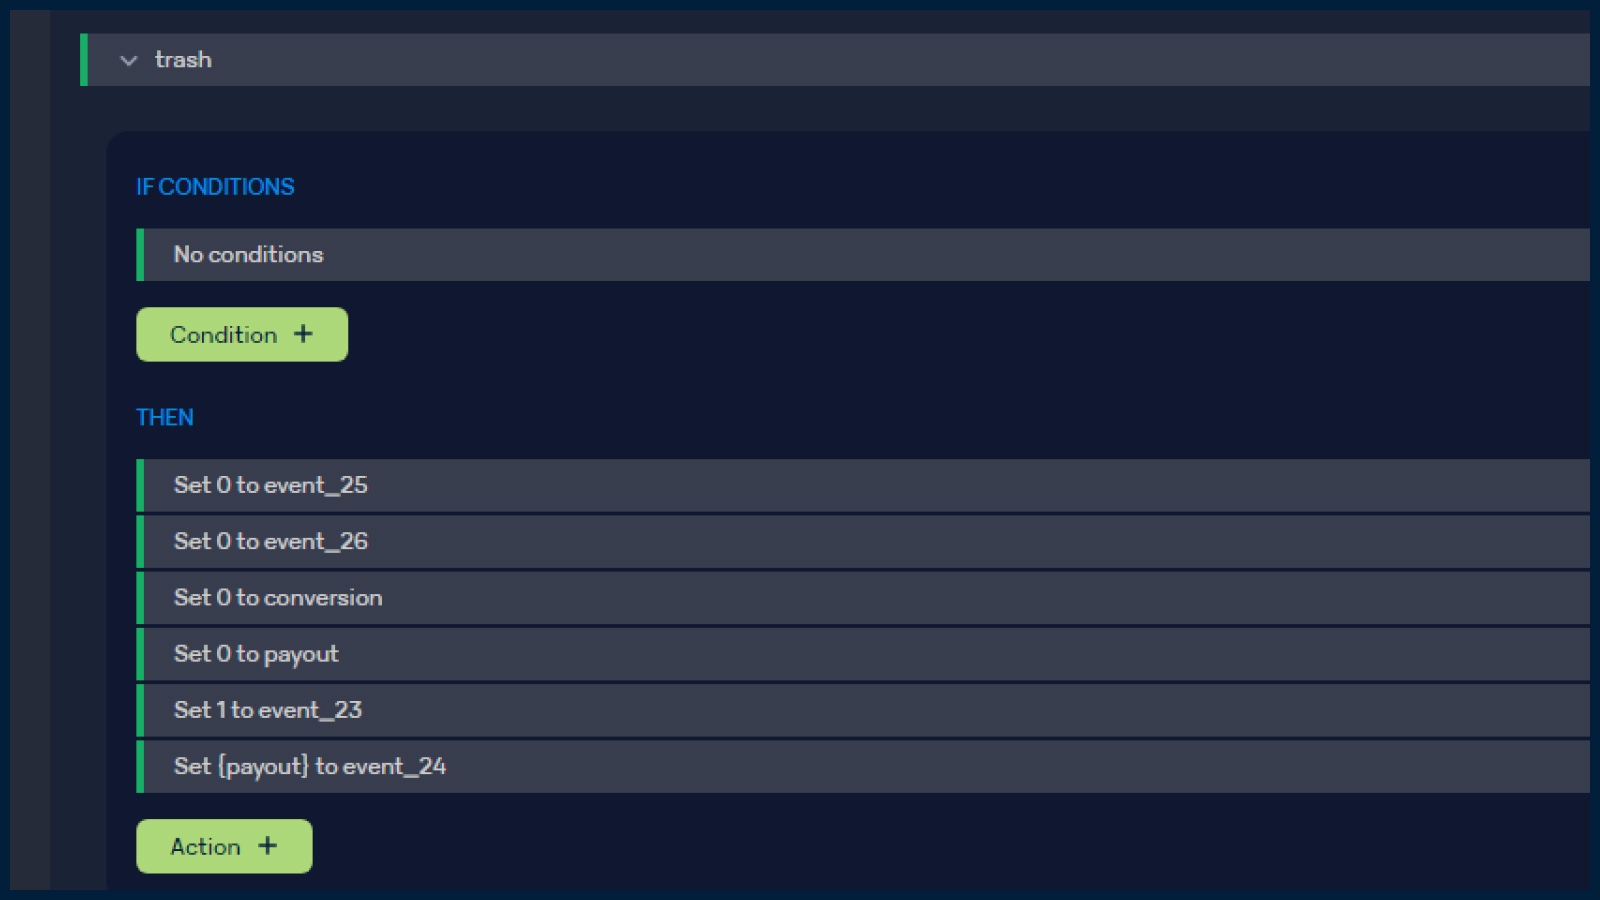
Events v2 update
In addition, the logic of sending events has changed. You need to set the “Update click key” in Settings > User. The final link will look like this: domain.com/Click_path?updkey=*Updateclickkey*&updclickid={clickid}&event1=1.
Requests from third-party services should be passed using the GET method.
Updates to the new version are released in Binom every 2 weeks. Therefore, it is possible that while you are reading this review, the service has already added new features to its functionality.
And let’s not forget
Firstly, with Binom, you can easily install SSL certificates on your landing pages. This is very useful if you want to avoid having your landings labeled as “untrustworthy.”
Secondly, Binom is an advanced tracker that enables you to track traffic with a pixel, bypassing the tracker. For more information, refer to the documentation.
Thirdly, Binom is integrated with an anti-fraud service, and in general, third-party programs can be integrated with the tracker via API. Isn’t that wonderful?
In addition, the company organizes various giveaways for users. For instance, it offers free licenses through social media raffles before the New Year and hosts article contests on forums.
Furthermore, while using the tracker, you can take part in the referral program. As per its terms, the user receives a lifetime 10% commission for each referred user. There are no restrictions, and the referral link can be found in your personal cabinet after registration.
Also, you can find helpful articles, guides, and tips on working with the tracker in the dedicated blog. A separate landing page provides a detailed description of all the features of Binom 2.0, which will be beneficial for affiliate marketers and media buyers.
Binom demo access and pricing
To evaluate the functionality of the updated tracker, you can utilize a 14-day trial period. If this duration is insufficient, you can extend it up to 30 days through the support team. The support team is available on weekdays from 10 AM to 10 PM (+3 GMT).
Furthermore, to obtain an extended trial period, enter the promo code ZORBAS. This allows using the tracker for a month for free and receive a 40% discount for the following month.
Regarding Binom’s license pricing, they vary depending on the tracker version and the duration of use.
v1:
- Binom 1.0 license — 10% discount $268 for 3 months
- Binom 1.0 license — 20% discount $476 for 6 months
- Binom 1.0 license — 30% discount $832 for 12 months
- Binom 1.0 Basic License $99 for each month
- Binom 1.0 Managed License $199 per month (cloud version)
v2:
- Binom 2.0 license — 10% discount $399 for 3 months
- Binom 2.0 license — 20% discount $714 for 6 months
- Binom 2.0 license — 30% discount $1,248 for 12 months
- Binom 2.0 Basic license $149 for each month
- Binom 2.0 Managed License $299 for each month (cloud version)
Conclusion
Binom 2.0 is an improved version of the original tracker that helps not only track traffic but also analyze conversions, work with landings, including cloaking, and much more. The platform has a wide range of tools and features that make working with Binom easier and more efficient. There is probably no task for which the service does not have a solution. And if you did not find the answers in our review — use the tracker’s documentation.
